5.6 KiB
Materials
The terrain can be textured simply by adding a material to channel 0 in the material section.
Here are some notes for better results.
Recommended Reading
- SpatialMaterial - demonstrates many of the shader options available in Godot.
- Shading Index - tutorials and the shader language API
- Shader API Reference - some of the most frequently accessed references
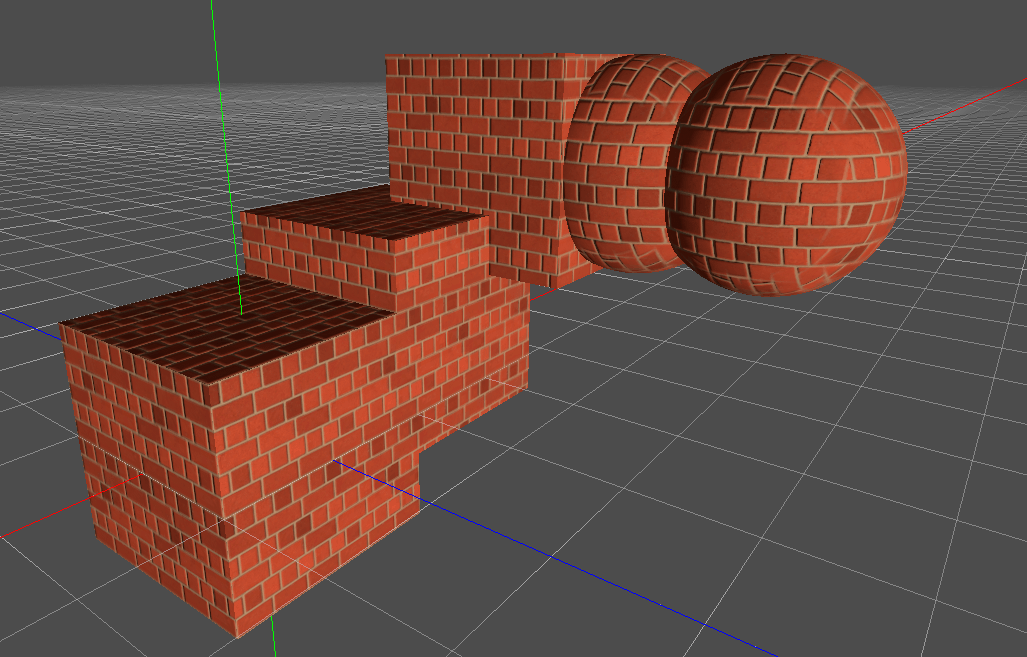
Triplanar Mapping
Projecting a flat, 2D image texture onto a rounded terrain is like wrapping a piece of paper wrapped around a sphere. It often warps the texture in undesirable ways. Triplanar mapping is a wrapping method that provides a reasonable result for spheres and terrains.
The method involves projecting the texture on to the part of object that directly faces the X-axis. Then projecting it on the sides that directly face the Y-axis. Then again for the Z-axis. The edges of these projections are then blended together with a specified sharpness.
Look at how the brick textures are blended together on the top right sphere.
Read about triplanar mapping in Godot.
The algorithm to implement this is a little complicated, which gets far worse if you also wish to add normal maps and others. However there is a very easy way to do this in the section below.
Creating A Material
Rather than writing your own shader from scratch, especially with triplanar mapping code, the recommended process is to create a SpatialMaterial, then optionally convert it to a ShaderMaterial.
- Create a new SpatialMaterial.
- Add an albedo texture, and if desired, normal map, ambient occlusion, etc.
- Under UV1, turn on triplanar mapping and adjust triplanar sharpness as desired.
- Scale and style the material as desired.
- Optionally convert the material to a shader.
If you want to start without a texture and just want to use a color, try turning down roughness, or adding some metalic to give the surface some reflectivity. This will allow light to reflect off of the curves of the terrain in the distance. Otherwise you'll just see an undifferentiated mass of color.
Enable Built-In Ambient Occlusion
VoxelTerrain adds Ambient Occlusion to the vertex colors on blocky terrains. You can add this to your material by enabling the Vertex Color/Use As Albedo flag in your material. Below is what that looks like on an otherwise plain white material. AO can also be added to any terrain using the AO feature built in to materials.

How To View Live Changes To Materials Or When Placing Objects
You can't view the terrain in the editor, so there are two options to view your material live while making changes:
- Add a sphere or cube with the same material, then adjust the material in the editor. This option is OK, but the UV scale is usually different than the terrain, so it's not ideal.
- Run your scene, focus the camera on the terrain, reduce the game window and move it to the side, then move the editor window to the other side. With both the editor and game displayed simultaneously, you can adjust the material in the inspector panel and it will update live.
All edits to a SpatialMaterial or the shader parameters of your ShaderMaterial will update live. Editing your shader code will not update live. (Though it may be possible to trigger the engine to recompile your shader code.) You can also use this method to place objects.
Convert To Shader Code
The SpatialMaterial is a very good base, but can only go so far. If you need further customization, you'll want to convert it to shader code.
- Add the material to any object.
- In the inspector for that object, click the down arrow next to the material.
- Click convert to ShaderMaterial.
Your material now has shader code that produces the same material your SpatialMaterial did, including code for triplanar albedo and normal maps!
Note, you can't edit the shader code and see live changes. You must stop and restart your scene. However you can change shader parameters live.
Advanced Shading
One of the best ways to learn about shaders is to pick apart and experiment with other's shader code.
Here's a shader that supports two materials, such as grass on the top and rock on the sides, each with triplanar mapped albedo, normal and AO maps, then blended together based on if their normal faces the upward direction or the sides.
You can find a working example in the fps demo, or see the shader itself.
In the shader parameters, add your two albedo maps, and optionally normal, and AO maps. Then play with the AB Mix 1 and AB Mix 2 sliders to adjust how the top and sides blend together. The other settings should be self explanatory. The screenshot below also has a little bit of fog and far DOF added.
