This was Example 017 Helloworld mobile for WinCE 6. But WinCE6 support has been removed for Irrlicht 1.9. If you still need that please use Irrlicht 1.8 or svn revision 5045 which was the last one to include it.
Sources still kept for now as it compiles on other platform too. And we might use this example again once we support Windows RT.
#include <irrlicht.h>
#if defined ( _IRR_WINDOWS_ )
#include <windows.h>
#endif
using namespace irr;
using namespace core;
using namespace scene;
using namespace video;
using namespace io;
using namespace gui;
#pragma comment(lib, "Irrlicht.lib")
class EventReceiver_basic : public IEventReceiver
{
private:
IrrlichtDevice *Device;
public:
EventReceiver_basic ( IrrlichtDevice *device ): Device ( device ) {}
virtual bool OnEvent(const SEvent& event)
{
if (event.EventType == EET_GUI_EVENT)
{
s32 id = event.GUIEvent.Caller->getID();
switch(event.GUIEvent.EventType)
{
case EGET_BUTTON_CLICKED:
if (id == 2)
{
Device->closeDevice();
return true;
} break;
}
}
return false;
}
};
class CSampleSceneNode : public ISceneNode
{
aabbox3d<f32> Box;
S3DVertex Vertices[4];
SMaterial Material;
public:
CSampleSceneNode(ISceneNode* parent, ISceneManager* mgr, s32 id)
: ISceneNode(parent, mgr, id)
{
Material.Wireframe = false;
Material.Lighting = false;
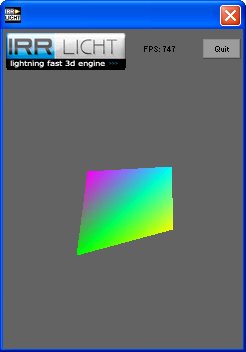
Vertices[0] = S3DVertex(0,0,10, 1,1,0, SColor(255,0,255,255), 0, 1);
Vertices[1] = S3DVertex(10,0,-10, 1,0,0, SColor(255,255,0,255), 1, 1);
Vertices[2] = S3DVertex(0,20,0, 0,1,1, SColor(255,255,255,0), 1, 0);
Vertices[3] = S3DVertex(-10,0,-10, 0,0,1, SColor(255,0,255,0), 0, 0);
Box.reset(Vertices[0].Pos);
for (s32 i=1; i<4; ++i)
Box.addInternalPoint(Vertices[i].Pos);
}
virtual void OnRegisterSceneNode()
{
if (IsVisible)
SceneManager->registerNodeForRendering(this);
ISceneNode::OnRegisterSceneNode();
}
virtual void render()
{
u16 indices[] = { 0,2,3, 2,1,3, 1,0,3, 2,0,1 };
IVideoDriver* driver = SceneManager->getVideoDriver();
driver->setMaterial(Material);
driver->setTransform(ETS_WORLD, AbsoluteTransformation);
driver->drawIndexedTriangleList(&Vertices[0], 4, &indices[0], 4);
}
virtual const aabbox3d<f32>& getBoundingBox() const
{
return Box;
}
virtual u32 getMaterialCount()
{
return 1;
}
virtual SMaterial& getMaterial(u32 i)
{
return Material;
}
};
! Startup a Windows Mobile Device
IrrlichtDevice *startup()
{
E_DRIVER_TYPE driverType = EDT_SOFTWARE;
IrrlichtDevice *device = 0;
device = createDevice(driverType, dimension2d<u32>(240, 320), 16, false );
if ( 0 == device )
return 0;
IVideoDriver* driver = device->getVideoDriver();
ISceneManager* smgr = device->getSceneManager();
IGUIEnvironment* guienv = device->getGUIEnvironment();
#if defined (_IRR_WINDOWS_)
{
wchar_t buf[255];
GetModuleFileNameW ( 0, buf, 255 );
io::path base = buf;
base = base.subString ( 0, base.findLast ( '\\' ) + 1 );
device->getFileSystem()->addFileArchive ( base );
}
#endif
IGUIStaticText *text = guienv->addStaticText(L"FPS: 25",
rect<s32>(140,15,200,30), false, false, 0, 100 );
guienv->addButton(core::rect<int>(200,10,238,30), 0, 2, L"Quit");
guienv->addImage(driver->getTexture("../../media/irrlichtlogo3.png"),
core::position2d<s32>(0,-2));
return device;
}
!
int run ( IrrlichtDevice *device )
{
while(device->run())
if (device->isWindowActive())
{
device->getVideoDriver()->beginScene(true, true, SColor(0,100,100,100));
device->getSceneManager()->drawAll();
device->getGUIEnvironment()->drawAll();
device->getVideoDriver()->endScene ();
IGUIElement *stat = device->getGUIEnvironment()->
getRootGUIElement()->getElementFromId ( 100 );
if ( stat )
{
stringw str = L"FPS: ";
str += (s32)device->getVideoDriver()->getFPS();
stat->setText ( str.c_str() );
}
}
device->drop();
return 0;
}
!
int example_customscenenode()
{
IrrlichtDevice *device = startup();
if (device == 0)
return 1;
EventReceiver_basic receiver(device);
device->setEventReceiver(&receiver);
IVideoDriver* driver = device->getVideoDriver();
ISceneManager* smgr = device->getSceneManager();
IGUIEnvironment* guienv = device->getGUIEnvironment();
smgr->addCameraSceneNode(0, vector3df(0,-40,0), vector3df(0,0,0));
CSampleSceneNode *myNode =
new CSampleSceneNode(smgr->getRootSceneNode(), smgr, 666);
ISceneNodeAnimator* anim =
smgr->createRotationAnimator(vector3df(0.8f, 0, 0.8f));
if(anim)
{
myNode->addAnimator(anim);
anim->drop();
anim = 0;
}
myNode->drop();
myNode = 0;
return run ( device );
}
class EventReceiver_terrain : public IEventReceiver
{
public:
EventReceiver_terrain(IrrlichtDevice *device, scene::ISceneNode* terrain, scene::ISceneNode* skybox, scene::ISceneNode* skydome) :
Device ( device ), Terrain(terrain), Skybox(skybox), Skydome(skydome), showBox(true)
{
Skybox->setVisible(true);
Skydome->setVisible(false);
}
bool OnEvent(const SEvent& event)
{
if (event.EventType == EET_GUI_EVENT)
{
s32 id = event.GUIEvent.Caller->getID();
switch(event.GUIEvent.EventType)
{
case EGET_BUTTON_CLICKED:
if (id == 2)
{
Device->closeDevice();
return true;
} break;
}
}
if (event.EventType == irr::EET_KEY_INPUT_EVENT && !event.KeyInput.PressedDown)
{
switch (event.KeyInput.Key)
{
case irr::KEY_KEY_W:
Terrain->setMaterialFlag(video::EMF_WIREFRAME,
!Terrain->getMaterial(0).Wireframe);
Terrain->setMaterialFlag(video::EMF_POINTCLOUD, false);
return true;
case irr::KEY_KEY_P:
Terrain->setMaterialFlag(video::EMF_POINTCLOUD,
!Terrain->getMaterial(0).PointCloud);
Terrain->setMaterialFlag(video::EMF_WIREFRAME, false);
return true;
case irr::KEY_KEY_D:
Terrain->setMaterialType(
Terrain->getMaterial(0).MaterialType == video::EMT_SOLID ?
video::EMT_DETAIL_MAP : video::EMT_SOLID);
return true;
case irr::KEY_KEY_S:
showBox=!showBox;
Skybox->setVisible(showBox);
Skydome->setVisible(!showBox);
return true;
default:
break;
}
}
return false;
}
private:
IrrlichtDevice *Device;
scene::ISceneNode* Terrain;
scene::ISceneNode* Skybox;
scene::ISceneNode* Skydome;
bool showBox;
};
The start of the main function starts like in most other example. We ask the user for the desired renderer and start it up. This time with the advanced parameter handling.
int example_terrain()
{
IrrlichtDevice *device = startup();
if (device == 0)
return 1;
First, we add standard stuff to the scene: A nice irrlicht engine logo, a small help text, a user controlled camera, and we disable the mouse cursor.
video::IVideoDriver* driver = device->getVideoDriver();
scene::ISceneManager* smgr = device->getSceneManager();
gui::IGUIEnvironment* env = device->getGUIEnvironment();
env->addStaticText(
L"Press 'W' to change wireframe mode\nPress 'D' to toggle detail map\nPress 'S' to toggle skybox/skydome",
core::rect<s32>(5,250,235,320), true, true, 0, -1, true);
scene::ICameraSceneNode* camera =
smgr->addCameraSceneNodeFPS(0,100.0f,1.2f);
camera->setPosition(core::vector3df(2700*2,255*2,2600*2));
camera->setTarget(core::vector3df(2397*2,343*2,2700*2));
camera->setFarValue(42000.0f);
device->getCursorControl()->setVisible(false);
Here comes the terrain renderer scene node: We add it just like any other scene node to the scene using ISceneManager::addTerrainSceneNode(). The only parameter we use is a file name to the heightmap we use. A heightmap is simply a gray scale texture. The terrain renderer loads it and creates the 3D terrain from it.
To make the terrain look more big, we change the scale factor of it to (40, 4.4, 40). Because we don't have any dynamic lights in the scene, we switch off the lighting, and we set the file terrain-texture.jpg as texture for the terrain and detailmap3.jpg as second texture, called detail map. At last, we set the scale values for the texture: The first texture will be repeated only one time over the whole terrain, and the second one (detail map) 20 times.
scene::ITerrainSceneNode* terrain = smgr->addTerrainSceneNode(
"../../media/terrain-heightmap.bmp",
0,
-1,
core::vector3df(0.f, 0.f, 0.f),
core::vector3df(0.f, 0.f, 0.f),
core::vector3df(40.f, 4.4f, 40.f),
video::SColor ( 255, 255, 255, 255 ),
5,
scene::ETPS_17,
4
);
if ( terrain )
{
terrain->setMaterialFlag(video::EMF_LIGHTING, false);
terrain->setMaterialTexture(0,
driver->getTexture("../../media/terrain-texture.jpg"));
terrain->setMaterialTexture(1,
driver->getTexture("../../media/detailmap3.jpg"));
terrain->setMaterialType(video::EMT_DETAIL_MAP);
terrain->scaleTexture(1.0f, 20.0f);
To be able to do collision with the terrain, we create a triangle selector. If you want to know what triangle selectors do, just take a look into the collision tutorial. The terrain triangle selector works together with the terrain. To demonstrate this, we create a collision response animator and attach it to the camera, so that the camera will not be able to fly through the terrain.
scene::ITriangleSelector* selector
= smgr->createTerrainTriangleSelector(terrain, 0);
terrain->setTriangleSelector(selector);
scene::ISceneNodeAnimator* anim = smgr->createCollisionResponseAnimator(
selector, camera, core::vector3df(60,100,60),
core::vector3df(0,0,0),
core::vector3df(0,50,0));
selector->drop();
camera->addAnimator(anim);
anim->drop();
If you need access to the terrain data you can also do this directly via the following code fragment.
scene::CDynamicMeshBuffer* buffer = new scene::CDynamicMeshBuffer(video::EVT_2TCOORDS, video::EIT_16BIT);
terrain->getMeshBufferForLOD(*buffer, 0);
video::S3DVertex2TCoords* data = (video::S3DVertex2TCoords*)buffer->getVertexBuffer().getData();
buffer->drop();
}
To make the user be able to switch between normal and wireframe mode, we create an instance of the event receiver from above and let Irrlicht know about it. In addition, we add the skybox which we already used in lots of Irrlicht examples and a skydome, which is shown mutually exclusive with the skybox by pressing 'S'.
driver->setTextureCreationFlag(video::ETCF_CREATE_MIP_MAPS, false);
scene::ISceneNode* skybox=smgr->addSkyBoxSceneNode(
driver->getTexture("../../media/irrlicht2_up.jpg"),
driver->getTexture("../../media/irrlicht2_dn.jpg"),
driver->getTexture("../../media/irrlicht2_lf.jpg"),
driver->getTexture("../../media/irrlicht2_rt.jpg"),
driver->getTexture("../../media/irrlicht2_ft.jpg"),
driver->getTexture("../../media/irrlicht2_bk.jpg"));
scene::ISceneNode* skydome=smgr->addSkyDomeSceneNode(driver->getTexture("../../media/skydome.jpg"),16,8,0.95f,2.0f);
driver->setTextureCreationFlag(video::ETCF_CREATE_MIP_MAPS, true);
EventReceiver_terrain receiver( device, terrain, skybox, skydome);
device->setEventReceiver(&receiver);
return run ( device );
}
int example_helloworld()
{
IrrlichtDevice *device = startup();
if (device == 0)
return 1;
IVideoDriver* driver = device->getVideoDriver();
ISceneManager* smgr = device->getSceneManager();
IGUIEnvironment* guienv = device->getGUIEnvironment();
IAnimatedMesh* mesh = smgr->getMesh("../../media/sydney.md2");
if (!mesh)
{
device->drop();
return 1;
}
IAnimatedMeshSceneNode* node = smgr->addAnimatedMeshSceneNode( mesh );
To let the mesh look a little bit nicer, we change its material. We disable lighting because we do not have a dynamic light in here, and the mesh would be totally black otherwise. Then we set the frame loop, such that the predefined STAND animation is used. And last, we apply a texture to the mesh. Without it the mesh would be drawn using only a color.
if (node)
{
node->setMaterialFlag(EMF_LIGHTING, false);
node->setMD2Animation(scene::EMAT_STAND);
node->setMaterialTexture( 0, driver->getTexture("../../media/sydney.bmp") );
}
To look at the mesh, we place a camera into 3d space at the position (0, 30, -40). The camera looks from there to (0,5,0), which is approximately the place where our md2 model is.
smgr->addCameraSceneNode(0, vector3df(0,30,-40), vector3df(0,5,0));
EventReceiver_basic receiver(device);
device->setEventReceiver(&receiver);
return run ( device );
}
#if defined (_IRR_WINDOWS_)
#pragma comment(linker, "/subsystem:windows /ENTRY:mainCRTStartup")
#endif
int main()
{
example_helloworld ();
example_customscenenode();
}