array(
'subdirs' => array(
'techtree' => array(
'gen' => 108,
'text' => '
Because so many people have asked, here\'s a full tech tree. Note that most Warzone technologies have more than one prerequisite, so you\'ll have to click through to see all the prerequisites.
Many Warzone technologies have more than one prerequisite, so they\'re listed under their first prerequisite, and subsequent prerequisites just have a "See above" link to where they\'re first mentioned.
Some random statistics: There are 428 technologies. Stormbringer Emplacement takes the longest to research. EMP Mortar has more prerequisites, though, but you can theoretically get it faster because you can spread them out over many research facilities. Other technologies with many requirements include Missile Fortress, Mass Driver Fortress, and Plasmite Bomb.
',
'title' => '',
'titlebar' => ''
)
)
),
'suggestions' => array(
'autogen' => TRUE,
'title' => 'Suggestions',
'titlebar' => 'Suggestions',
'text' => 'v0.1 by Ratarf - Last updated: 10/10/2008
This page tracks feature requests for the game Warzone 2100.
Of course, we need a better, more dynamic approach before we can actually put this page in use. For example using PHP or the wiki. This version is only an example of how it COULD look, and meant primarly for getting as much feedback as possible, so we can use the maximum potential.
For now, this page contains some random suggestions. These are all scraped from the warzone forums without mentioning who suggested them. If any content on this page is your property, and you would like to see it removed, please post in the appropriate forum thread.
For more \'about\'-information, look below the list!
All discussion about this page can be found here: http://forums.wz2100.net/viewtopic.php?f=2&t=2212. Please help us improve this page by giving your opinion!
Graphical user-interface suggestions, both ingame as in the menu.
Feature |
State |
More Info |
Comment |
| Design screen tooltip |
Idea |
Wishlist |
Show design name + required power |
| Power summary window |
Idea |
Wishlist |
Show derricks owned, power production per minute,... |
| Recycled units list |
Idea |
Wishlist |
Show ranks of pilot crews in queue |
| Move \'Skirmish\' to Singleplayer |
Trunk |
/ |
Makes more sense! |
Suggestions related to the terrain and the world.
Feature |
State |
More Info |
Comment |
Suggestions related to units and the manufacturing of units.
Feature |
State |
More Info |
Comment |
| Take all power at start of order |
Idea |
Wishlist |
Optional, requires ctrl + click |
| Realistic turning for tracked units |
Idea |
??? |
Drive backwards, rotate in place,... |
Building and buildings
Feature |
State |
More Info |
Comment |
| Gates |
Mod |
|
Optional, requires ctrl + click |
| Semi-Transparent �previews� of ordered buildings |
Idea |
Wishlist |
|
All suggestions that do not fit in another category
Feature |
State |
More Info |
Comment |
| Multiplayer savegames |
Planned |
??? |
|
- Please no balancing stuff here. This would really clutter this page.
- Not too much technical details here. Off course an important \'AI patch\' is legal, but no bugfixes or references to code lines please.
- This page lists features that might make it in the game someday. It\'s purpose is not to list ALL suggestions ever made.
Where does this come from?
The idea for this page comes from the OpenTTD Community. They have such a nice system for tracking features there, especially when compared to the chronological wishlist threats on the warzone forum, which are very cluttered. So why not use a similar approach here?
Specific pages to learn from:
Idea |
Just an idea someone, or more people, came up with. |
Concept |
Properly sketched or prepared idea |
Planned |
Planned by the dev-team for a later release |
Mod |
Available in a mod |
Branch |
... |
Trunk |
... |
Stable Release |
... |
Wishlist |
Discussion about this feature is in the wishlist (see below). Happy searching! |
/ |
This feature is obvious and no further discussion (topic) is required |
Topic |
There\'s at least 1 discussion topic for this feature (there could also be a wiki article). So please note that there could be multiple links here! |
??? |
Not sure where this feature is discussed. |
The wishlist topics can be found here:
-
Wishlist 1
- Wishlist 2
- Wishlist 3
- Give players ONE place to look for new features
- Enable developers to get a quick overview of the things players want in the game
- Save people the time of looking up requests in a 15-pages long topic.
- Save everyone the time of explaining a feature over and over again because it gets lost in the threads.
- Allow player X\'s feature requests to inspire players Y and Z to yet another great idea.
- Move worthy suggestions from the wishlist to their own topic, with a clear name.
- Look for topics discussing certain existing features and add them to this list.
- Do useful feature requests the right way!
- Update the progress in this list (not available yet, since you can not edit it).
- Discuss everything about this page. Colors, categories,... Everything is welcome!
- Especially, discuss the best way to put this page in use, technically.
- Always keep looking for ways to do things the best way.
All discussion about this page can be found here: http://forums.wz2100.net/viewtopic.php?f=2&t=2212. Please help us improve this page by giving your opinion!
',
'cachedsb' => 'IntroductionFeatures ListAbout this pageWishlistWhy this list?How to help?'
),
'b' => array(
'subdirs' => array(
'commandcenter' => array(
'gen' => 109,
'text' => '
The Command Center is the heart of every Warzone base. It\'s needed for two things: To design units, and to show the minimap.
',
'title' => '',
'titlebar' => ''
),
'powergenerator' => array(
'gen' => 109,
'text' => '
The power generator in conjunction with oil derricks gives the player power. One power generator is needed for every four oil derricks, or the oil derricks will not function. Additional power generators will not generate any more power.
The power module gives power faster (+50.9% to the power multipliers - note that this is in addition to the fact that researching Power Module sets the base multiplier to 125%).
',
'title' => '',
'titlebar' => ''
),
'researchfacility' => array(
'gen' => 109,
'text' => '
The research facility allows the player to research upgrades and new technologies. One research facility can research one technology at a time, and research cannot be queued.
The research module allows for faster research (+85.7% to the current research multiplier).
',
'title' => '',
'titlebar' => ''
),
'factory' => array(
'gen' => 109,
'text' => '
Factories are needed to manufacture units: Factories produce tanks, Cyborg Factories produce cyborgs, and VTOL Factories produce VTOL aircraft.
Factories and VTOL Factories can be upgraded with Factory Modules up to two times. This will add 100% to its production rate multiplier and allow production of larger tanks/VTOLs. One Factory Module is needed to produce tanks with medium bodies, and two Factory Modules on the same Factory are needed to produce tanks with heavy bodies.
It takes a number of seconds equal to weight/100 to rearm a VTOL, before rearming pad upgrades.
',
'title' => '',
'titlebar' => ''
),
'commandrelaycenter' => array(
'gen' => 109,
'text' => '
The Command Relay Center is required to make Commanders (tanks with Command Turrets). Commanders provide bonuses to units assigned to them.
',
'title' => '',
'titlebar' => ''
)
)
),
'index' => array(
'autogen' => TRUE,
'title' => 'Home',
'titlebar' => 'Home',
'text' => '
Introduction
Warzone 2100 is a real-time strategy game, originally developed by Pumpkin Studios and published by Eidos Interactive, now developed by the Warzone 2100 Project. Compared to other real-time strategy games, it has a greater focus on artillery, radar, and counter-battery technologies, more frequent in-game cinematic updates as game play progresses, a massive research tree, as well as a vehicle design system.
Read more »
Manual
Reference
Advanced strategy
For developers
The Warzone 2100 Guide applies to the latest version, version 2.2, of Warzone 2100. For guides for other versions of the game, see NTW Guide or Warzone 1.10 Guide.
',
'cachedsb' => 'IntroductionManualReferenceAdvanced strategyFor developers'
),
'intro' => array(
'autogen' => TRUE,
'title' => 'Introduction',
'titlebar' => '» Introduction',
'text' => 'Introduction
Warzone 2100 is a real-time strategy game, originally developed by Pumpkin Studios and published by Eidos Interactive, now developed by the Warzone 2100 Project. Compared to other real-time strategy games, it has a greater focus on artillery, radar, and counter-battery technologies, more frequent in-game cinematic updates as game play progresses, a massive research tree, as well as a vehicle design system.
Story
In the late 21st century, NASDA (the North American Strategic Defense Agency) developed and deployed a massive missile defense system, including a network of nuclear-equipped satellites and ground-based launch sites. However, during a routine maintenance check, something went terribly wrong...
Read more »
Multiplayer
Outside of the story, Warzone 2100 only has a single faction. This limits some of the variety that can be expected from real-time strategy games, although the single faction is very complex. Essentially, Warzone 2100 plays much like Earth 2150 with 3D units and terrain, customizable vehicles, a lack of traditional infantry, use of "research" to acquire new technologies, and the differentiation of vehicles types.
Compared to other RTS\'s, Warzone 2100 has:
A unit design system that lets players choose bodies, propulsions, and weapons.
A greater emphasis on sensors and radar: Basic sensors detect units and can co-ordinate ground attacks. Counter-battery (CB) sensors detect enemy artillery batteries and coordinate artillery strikes against enemy artillery. VTOL sensors and VTOL CB sensors coordinate VTOL attacks. Radar detectors detect enemy sensors.
A greater emphasis on artillery: With the assistance of sensors, late game artillery can fire from huge distances.
A massive technology tree, with small incremental advancements over existing technologies being required for later technologies.
Installing
Warzone can be downloaded from:
On most distributions of Linux, Warzone should be available in your repositories. However, these are often outdated, and you are encouraged to compile Warzone yourself, which is the usual:
./configure && make
For compiling tips on other platforms, or if the above fails, see the Compile Guide.
Playing Warzone
See also: FAQ
The easiest way to learn how to play is to play the Tutorial in the game.
',
'cachedsb' => 'IntroductionStoryMultiplayerInstallingPlaying Warzone'
),
'weapons' => array(
'autogen' => TRUE,
'title' => 'Weapon Guide',
'titlebar' => '» Weapon guide',
'text' => 'Classification
Warzone weapons can be classified four different ways: targeting, type, class, and subclass.
Targeting
direct – Direct-fire weapons fire projectiles that fly in a straight line at their target.
erratic direct – A VTOL bomb. Equivalent to a direct weapon for all intents and purposes.
direct homing – Direct homing weapons will fire projectiles in the direction of their target, but the projectile will "home in" on its target, i.e. it will continually adjust itself so it will still hit its target if its target moves.
indirect – Indirect weapons, better known as artillery weapons, will fire in an arc, and do not require a line-of-sight between itself and what it\'s shooting. With the exception of the mini-rocket artillery, indirect weapons are generally used as long-range weapons. They require sensor turrets to take advantage of their long range.
Type
The type of a weapon determines what it\'s effective against and what it\'s not effective against.
See also: Weapon damage table
anti-personnel – Anti-personnel weapons are most effective against cyborgs. They do below-average damage to tracked tanks and hard structures, and average damage to other targets. All anti-personnel weapons can also hit VTOLs.
Examples: machineguns, lasers
anti-tank – Anti-tank weapons are most effective against tanks. They do below-average damage to everything else, and very little damage to cyborgs and hard structures. Most anti-tank weapons do high damage, but have low HP, and so are best protected by cannons. When wielded by cyborgs, many anti-tank weapons can also hit air.
Examples: mini-rockets, rockets, missiles
all-rounder – Despite their name, all-rounder weapons do not do average damage to everything: they do above-average damage against tanks and structures. They do below-average damage to bunkers, and average damage to everything else. The "traditional" all-rounder weapons have high HP, making them suitable for sieging a base.
Examples: cannons, rails, VTOL machineguns, Plasma Cannon
anti-structure – Anti-structure weapons do the most damage against bunkers, but a lot of damage against other structures. They do little damage against tanks and cyborgs. The bunker buster is the only anti-structure weapon in the base un-modded game of Warzone.
flamer – Flamers are very good against cyborgs and bunkers. They do good damage against most other targets, but practically no damage against hard structures. The only flamer weapons are in the flamer subclass.
artillery – Artillery-type weapons (not to be confused with artillery weapons, which don\'t include bombs) are like anti-personnel weapons: They do high damage to cyborgs and hard structures, low damage to bunkers, and moderate damage to everything else.
Examples: mortars, howitzers, bombs, all other artillery weapons, Laser Satellite Command Post
(anti-aircraft) – Anti-aircraft weapons technically have a type of "anti-tank", but they can only hit aircraft.
Examples: AA-guns, SAMs, Stormbringer
Note that just because a weapon\'s type does high damage to a particular target does not mean that it is suitable for that target. In particular, it would not be a good idea to use a laser satellite against a cyborg. On the other hand, Scourge Missile, while being an anti-tank weapon, can be useful for attacking unattended structures from a distance.
Class
kinetic – Kinetic weapons are weapons that derive most of their damage from their impact. Most weapons in Warzone are kinetic.
thermal – Thermal weapons are weapons that derive most of their damage from heat or fire. On average, they do greater damage to tanks and cyborgs. New Paradigm and Super Heavy bodies have high thermal armor, while Project and Collective bodies have low thermal armor.
Examples: lasers, flamers, incendiary artillery, firebombs, Laser Satellite Command Post
Again, just because a weapon\'s class does higher damage to a body does not mean the weapon itself is suitable to attack a tank with that body. In particular, lasers, as anti-personnel weapons, do low damage even to Collective bodies.
Special weapons
Some weapons are special, and can have one or more of the following attributes:
splash damage – Weapons with splash damage will do damage to everything in the area around where it hits. The area can be large or small, depending on the weapon.
Examples: artillery-type weapons, cannons, rails, Laser Satellite Command Post
fire damage – Weapons with fire damage (more than just flamers, not to be confused with thermal weapons) will cause things they hit to catch fire and take damage over a certain amount of time.
Examples: flamers, incendiary artillery, firebombs
EMP – EMP weapons will disable their target for a short period of time.
Examples: EMP cannon, VTOL EMP missile launcher, EMP mortar
Subclasses
By far the biggest most important division between weapons is the subclasses.
Research tips: Unless otherwise specified, stronger weapons in a subclass are obtained by upgrading that subclass. Stronger weapons, as well as stronger weapon upgrades, generally require better research speed upgrades (Synaptic Link Data Analysis, Dedicated Synaptic Link Data Analysis, Neural Synapse Research Brain). Most stronger weapons require damage upgrades, although rotary weapons usually require rate-of-fire (ROF) upgrades instead.
T1 Subclasses
Machineguns
The first weapon you get in Warzone is the Machinegun, and the Twin Machinegun and Heavy Machinegun (often called HMG) shortly thereafter. Machineguns (often called MGs) are good all-rounder weapons, but quickly get outclassed by anti-tank weapons.
Mini-Rockets
The Mini-Rocket Pod, obtained by researching Fuel Injection Engine, is a good early-T1 anti-tank weapon, but it will quickly lose out to more powerful anti-tank weapons such as cannons and rockets. The Mini-Rocket Artillery (often called MRL) is a good complement for anti-tank weapons, best against the targets anti-tank weapons like mini-rockets and rockets are worst against, but users of Mini-Rockets will find themselves disadvantaged against a research rusher if they do not upgrade to Lancers as soon as possible.
Cannons
Cannons, obtained by upgrading machinegun damage, (Light Cannon, Medium Cannon, Heavy Cannon, often abbreviated LC, MC, and HC respectively) are weapons with high HP and moderate damage against tanks and walls. VTOL cannons, unlike VTOL rockets, cannot attack other VTOLs.
Rockets
The Lancer, obtained by upgrading mini-rocket damage and acccuracy, is an anti-tank weapon with low HP, high damage, and long range. Unlike the cannon, however, it is very ineffective against cyborgs and walls. VTOL lancers, unlike VTOL cannons, are effective against other VTOLs, although they do plenty of damage to ground tanks, as well.
Users of rockets and missiles should remember to right-click them and set them to Long Range for maximum effectiveness.
The Bunker Buster, also obtained by upgrading mini-rocket damage and accuracy, is the only anti-structure weapon, and is generally used as a support weapon to destroy enemy defensive structures.
Flamers
Flamers, obtained by upgrading machineguns and Fuel Injection Engine, have the lowest range and highest damage rate of all T1 weapons, once their incendiary effect (read: setting things on fire) is taken into account. They also do fire damage to multiple targets within range at once, making them deadly if they survive to get close to enemy tanks, cyborgs, and bunkers. However, they are usually very weak, making hit-and-run tactics surprisingly effective on them.
Although the flamer is very effective against tanks, cyborgs, and bunkers, it is extremely ineffective against walls.
Since cyborgs are inexpensive (and thus can be massed) and have high speed, flamers are best used on cyborgs.
Mortars
Mortars, obtained by upgrading cannons, are artillery weapons. As artillery weapons, they have a relatively low damage rate but very long range when assigned to a sensor. They are good all-rounder weapons, but do especially high damage against cyborgs, and relatively low damage to tracked tanks. Because of their low damage rate and low HP, they do very poorly in close-ranged combat, and should be carefully protected by direct-fire weapons.
Bombs
The Cluster Bombs Bay is the VTOL equivalent of an artillery weapon like the mortar. An all-rounder weapon.
T2 Subclasses
Machineguns
The Assault Gun is useful against cyborgs, and Rotary MG Bunkers are particularly inexpensive, but they aren\'t as good general-purpose weapons as cannons or mortars.
Cannons
The Hyper Velocity Cannon is a longer-range cannon with lower HP. It still has higher HP and lower damage than a rocket, and is similar to the T1 cannons in every other way.
Although the Hyper Velocity Cannon (often called HPV or HVC) is the only actual T2 cannon, Heavy Cannons are also very usable in T2.
Rockets
The Tank Killer is similar to a Lancer, but has a slightly longer range, higher damage rate, and a slower reload.
Ripple Rockets are the earliest very-long-range artillery players can get. It has a very slow reload time, but is devastating to enemy structures.
Flamers
The Inferno is a more powerful flamer, and is used similarly.
Mortars
The incendiary mortar is a twist on the generic artillery concept, for anyone who wishes to digress their mortar research into flamers.
Howitzers
Howitzers are mortars with significantly longer range and slower reloading. They are used similarly to mortars.
Bombs
Firebombs, obtained by upgrading bombs and flamers, are useful for damaging a wide area.
T3 weapons
Cannons
Cannons are (debatably) the only T1 subclass to be usable in T3, and even the best cannon upgrades are cheaper than T3 weapon upgrades – notable to anyone who wishes to save money on research. Assault cannons are used similarly to cannons in T1, although, as assault weapons, they are better against cyborgs than their predecessors.
Missiles
The Scourge Missile, obtained by upgrading rockets, is the only homing ground-to-ground and air-to-ground tank weapon (technically, lasers are also homing, but their projectiles move too quickly to make a difference). It also has the highest damage rate of any medium or long range weapon, and is tied for longest-range direct-fire ground weapon. Though it has many strenghths, it shares the weaknesses of its predecessors: Low HP and ineffectiveness against cyborgs and walls.
Angel Missiles are a stronger version of Mini-Rocket Artillery. Archangel Missiles are stronger long-range artillery with slow reload times, similar to Ripple Rockets. Archangel Missiles have the longest range of any artillery weapon.
Rail guns
Rail guns, obtained by upgrading cannons, are improved, long-range versions of T1 cannons with higher HP and damage rate. They are used similarly.
Lasers
Lasers are the first thermal weapon that isn\'t a fire weapon. They are anti-personnel, and are used similarly to machineguns at all. Although their reload time isn\'t nearly as fast as a rotary weapon, they still usually have faster reload times than most other weapons.
Flashlight and Pulse Laser are long-range weapons (Pulse Laser being tied with Scourge for longest-range direct-fire ground weapon). They are good general-purpose weapons.
Heavy Laser is a short-range weapon with a high damage rate. Plasma Cannon is an even shorter-range weapon with a higher damage rate and a slow reload time.
Flamers
The Plasmite Flamer is an even more powerful flamer, and is used similarly to the Inferno.
',
'cachedsb' => 'ClassificationTargetingTypeClassSpecial weaponsSubclassesT1 SubclassesT2 SubclassesT3 weapons'
),
'damage' => array(
'autogen' => TRUE,
'title' => 'Damage formula',
'titlebar' => '» Damage calculation',
'text' => '
Ever wonder how damage is calculated in Warzone? If you just want to know if armor is subtractive or multiplicative, it\'s subtractive:
[DAMAGE] = [BASE DAMAGE] - [ARMOR]
or
[DAMAGE] = 30% x [BASE DAMAGE]
whichever is higher.
But to know exactly how much damage you\'re going to do, you need to know how to calculate base damage.
[BASE DAMAGE] = [WEAPON DAMAGE] x [WEAPON SUBCLASS DAMAGE UPGRADE] x [WEAPON TARGET MODIFIER]
[ARMOR] = [TARGET WEAPON CLASS ARMOR] x [CLASS ARMOR UPGRADE]
Damage is [BASE DAMAGE] - [ARMOR], or 30% of [BASE DAMAGE], whichever is higher, rounded down (The exception is when rounding down would make damage 0, in which case damage is rounded up to 1).
Weapon Multiplier Table
Use values in this table for [WEAPON TARGET MODIFIER].
This table can also be found in the Weapons section of Turrets.
| | AP | Anti-Tank | Anti-Struct | Artillery | Flamer | All-Rounder |
|---|
| Cyborg | 140% | 30% | 30% | 130% | 130% | 60% |
|---|
| Wheels | 100% | 130% | 30% | 95% | 110% | 120% |
|---|
| Half-Tracks | 80% | 125% | 40% | 80% | 100% | 110% |
|---|
| Tracks | 60% | 120% | 50% | 65% | 90% | 100% |
|---|
| VTOL | 60% | 80% | 30% | 40% | 25% | 50% |
|---|
| Hover | 110% | 100% | 20% | 110% | 130% | 100% |
|---|
| Soft structures | 160% | 75% | 100% | 200% | 150% | 130% |
|---|
| Medium structures | 80% | 50% | 120% | 120% | 60% | 110% |
|---|
| Hard structures | 45% | 25% | 300% | 100% | 10% | 90% |
|---|
| Bunkers | 80% | 60% | 400% | 40% | 300% | 50% |
|---|
Clarification
[WEAPON DAMAGE] is the base damage of the weapon - what you see in the "Damage" column of the turret table.
[WEAPON SUBCLASS DAMAGE UPGRADE] is the best damage upgrade you\'ve researched for the weapon\'s subclass.
[WEAPON TARGET MODIFIER] is the multiplier in the above damage table.
[TARGET WEAPON CLASS ARMOR] is the target\'s thermal armor for thermal weapons, and kinetic armor for kinetic weapons. In tanks and VTOLs, thermal armor depends on nothing but the vehicle body.
[CLASS ARMOR UPGRADE] is the best kinetic/thermal armor upgrade your target has researched for it.
An example
Green\'s Tank Killer Scorpion Half-Tracks shoots Yellow\'s Heavy Cannon Python Tracks. Green has HESH Rocket Warhead Mk2, and Yellow has Dense Composite Alloys.
Tank Killer (an anti-tank weapon) has 120 damage. HESH Rocket Warhead Mk2 gives 150%, and anti-tank weapons do 110% damage against tracks.
[BASE DAMAGE] = 120 x 150% x 110% = 198.
Tank Killer is a kinetic weapon, and Python has 20 Kinetic Armor. Dense Composite Alloys upgrades 220%.
[ARMOR] = 20 x 220% = 44
198 - 44 (154) is greater than 198 x 30% (59), so the tank killer does 154 damage each time it hits (Notice that it fires four salvos; if they all hit, the tank killer does 616 damage, a significant proportion of the 880 HP the heavy cannon tank has).
',
'cachedsb' => 'The formulaWeapon Multiplier TableClarificationAn example'
),
'sensors' => array(
'autogen' => TRUE,
'title' => 'Sensors and artillery',
'titlebar' => '» Basics » Using sensors and artillery',
'text' => '
See also: Commanders
Artillery
As a review, keep in mind that "artillery" here refers to all indirect-fire weapons except the Mini-Rocket Array (MRL) and Seraph Missile Array, namely:
- Mortars (mortar, bombard, pepperpot, incendiary mortar)
- Howitzers (howitzer, ground shaker, hellstorm, incendiary howitzer)
- Ripple rockets
- Archangel missiles
Although the MRL and Seraph are indirect-fire weapons, they should be used like one would use direct-fire weapons, since their range is low enough that its internal sensor can handle it; external sensors are unnecessary.
Sensors

Regular sensors can be used for scouting and surveillance, but they have a more important usage: to spot for artillery.
Using sensors with artillery
Artillery weapons, by themselves, cannot fire more than their sensor range (8 tiles without upgrades). However, even the lowly mortar has an 18-tile weapon range. To use it, players need to use sensors.
Artillery structures are the easiest. Simply build a sensor tower, and if the sensor tower is targeting something within your artillery structures\' weapon range, they will fire at it.
An artillery tank, however, needs to be explicitly assigned to a sensor to function. Select the artillery tanks, then click on a sensor to assign the tank to the sensor.

Artillery assigned to a sensor. Notice the * next to them, which indicates that they are assigned.
Once the artillery is assigned, if it is assigned to a sensor tower, that tower will target enemies that come in range automatically.
If it is assigned to a sensor tank, the sensor can be used to attack enemies by selecting the sensor and targeting an enemy. All artillery assigned to the sensor will attack its target.

Notice that the artillery can be very far away—only the sensor turret needs to get within range.
To unassign a unit from a sensor, the easiest way is to right-click it, then tell it to move somewhere. Multiple units can be selected with ctrl+click, and moving them all.
CB sensors

A CB (Counter-Battery) tower or turret is used similarly to a standard sensor; however, it serves a specialized purpose: To counter-attack enemy artillery.
Normal sensor towers will direct your artillery to attack whatever is nearby, but CB towers will direct your artillery to attack any artillery attacking you, even if they are further away from you than other targets. If you have both a CB tower and a sensor tower, artillery structures will attack CB targets first, and only other targets once you are no longer being bombarded by enemy artillery.

A VTOL CB sensor does the same thing, except to VTOLs assigned to it.
Sensor towers
Sensor towers and sensor units have several major differences:
- A standard sensor turret has a range of 12; a standard sensor tower has a range of 16 (special sensor turrets have the same range as their tower).
- A sensor tower cannot be ordered to target something specific; they automatically target the nearest unit (except CB and VTOL CB towers).
- A sensor turret will not target anything automatically; it must be manually ordered to attack a target
What counts as a sensor
 =
= 
 =
= 
The Command Center (HQ) is also considered a standard sensor tower, while the Satellite Uplink Center is also considered a Wide Spectrum sensor tower. In addition to their usual functionality, they can also be used as the corresponding sensor tower (for instance, you can assign artillery to them).
Note that while the Uplink Center reveals the entire map, it does not provide sensor attack coverage over the entire map, but only within a 26-tile radius.
',
'cachedsb' => 'ArtillerySensors- Using sensors with artillery
- CB sensors
- Sensor towers
- What counts as a sensor
'
),
'design' => array(
'autogen' => TRUE,
'text' => 'Unfinished page
Design
You need to design new units and VTOLs if you want to overpower your enemies and get that sweet taste of victory. This aspect of the game is what makes Warzone unique in it\'s own way.
Screenshots

1: Designing a new unit

2: The unit being designed
Designing a unit
To make a new unit, select the Design icon in the Command Panel. This will make two columns appear on the left of the screen. To make a new design, select the green body. To select another unit to edit, just click it.
Designing a new unit is simple. It�s a three-step procedure: selecting a body, a propulsion system, and a turret. The three picked will result in a new unit.
More screenshots

Clockwise, from top left: Select a body, propulsion type, turret, and closing the menu.
Designing the unit
When a new unit is started, a list of bodies will appear on the right, with a green outline of a body in the centre. A two-column body list will appear on the right. Select one to move on to the next section � the propulsion type. Select a type and move on to the turret. There are two types of turrets, weapons and systems. Both are defined at the top of the two-column by buttons � you can switch by clicking the respective button. Select a turret, and you�re done.

Another set of screenshots
The top half of the Design (minus completed designs)
1: The name of a unit. You can click this and change it by typing.
2: Click this to change a body of a design.
3: Click this to change a propulsion type of a design.
4: Click this to change a turret of a design.
5: Click this to delete the currently selected design (only works with completed designs)
6: Power required to make the unit
7: Hit points the unit has
8: Select the System turrets (turret only, normal units only)
9: Select the Weapon turrets (turret only, normal units only)

10: How fast the unit moves over roads
11: How fast the unit moves off-road
12: How fast the unit moves over water
13: Weight of the unit (affects the speed and durability of the unit)
',
'title' => 'Design',
'titlebar' => '» Basics » Panel » Design',
'cachedsb' => ''
),
'basics' => array(
'autogen' => TRUE,
'text' => 'Basics
This is an introduction for complete beginners to Warzone. Much of this can be learned from the Tutorial, although we go into a bit more detail here.
',
'title' => 'Basics',
'titlebar' => '» Basics',
'cachedsb' => '- Basics'
),
'rankings' => array(
'autogen' => TRUE,
'text' => '
See also: Unit experience
Multiplayer rankings
Ever notice the stars and medals next to a player\'s name in the multiplayer screen? Here\'s how to get them.
If you have played 4 or fewer games, you will have a  (pacifier), and no other stars. Otherwise:
Top star
| Droids killed |
 Bronze Bronze | 150 |
 Silver Silver | 300 |
 Gold Gold | 600 |
Middle star
| Games played |
| Bronze | 50 |
| Silver | 100 |
| Gold | 200 |
Bottom star
| Games won |
| Bronze | 10 |
| Silver | 40 |
| Gold | 80 |
Medal
| Games won | Win:loss ratio |
 Silver chevron Silver chevron | 6 | 2:1 |
 Double chevron Double chevron | 12 | 4:1 |
 Gold star Gold star | 24 | 8:1 |
',
'title' => 'Multiplayer rankings',
'titlebar' => '» Multiplayer rankings',
'cachedsb' => ' - Multiplayer rankings
- Top star
- Middle star
- Bottom star
- Medal
'
),
'story' => array(
'autogen' => TRUE,
'text' => '
Story
In the late 21st century, NASDA (the North American Strategic Defense Agency) developed and deployed a massive missile defense system, including a network of nuclear-equipped satellites and ground-based launch sites. However, during a routine maintenance check, something went terribly wrong...
"The Collapse came fast and hard. Following a technical error in the satellite defense system, nuclear warheads were fired at Washington, Beijing and Moscow. Minutes later, ground based sites fired in response to the launch. Millions died as nuclear firestorms wiped out the world\'s cities. Billions more died as plagues and epidemics swept away what remained of civilization. Less than a million people survived the Collapse. Earth broke into hundreds of small scavenger bands battling each other for the remnants of the former civilization. Only a few had the vision to attempt to rebuild a new world from the ashes."
The player (referred to as "the Commander") is part of a group of survivors that seeks shelter in a military base in the Rocky Mountains. They emerge from the base with the goal of rebuilding the world, adopting the name "The Project".
The Project dispatches three teams with the objective of reclaiming artifacts, thus allowing the research and application of pre-Collapse technologies. Team Alpha is sent to an Arizona desert location southeast of Project HQ. Beta team is sent to the remains of Chicago. Gamma team is sent into the northern Rockies in Colorado.
See also: Walkthrough
Campaign One

In Campaign One, the Commander accompanies and commands Team Alpha in Arizona. Team Alpha\'s primary objective is to find and recover the "Synaptic Link" technology, which is later explained to allow a neural interface between man and machine, and thus the construction of cyborg infantry. Secondary objectives include the recovery of other artifacts and technology, and the elimination of hostiles.
The "Scavengers" are the first hostile race to be encountered. Weak but numerous, scavengers provide a small challenge. As technologies are recovered from the scavengers, the Project encounters the "New Paradigm". This faction is hostile to the Project, and possesses superior technology.
A transmission to the New Paradigm is intercepted by the Project and it is apparent that the New Paradigm is following orders by some entity called "Nexus". The Project eventually chases the New Paradigm to their home base. As the last standing base of the New Paradigm is eradicated, Team Beta sends a distress signal and informs Team Alpha that they are under attack and need reinforcements. Team Alpha loads reinforcements on transport bound for Beta Base, and Campaign One ends.
Campaign Two

In Campaign Two, the commander arrives at and takes control of Beta Base in the ruins of Chicago. After fending off a fierce attack by an unnamed enemy, Project HQ informs the commander that the primary objective of Team Beta is to recover VTOL technology from before the Collapse.
It is discovered that Team Beta\'s attackers call themselves "The Collective" and constantly attempt to attack and destroy Beta team. As attacks increase in strength, the commander is also sent to destroy missile bases in the area. Though these are successfully destroyed, Project HQ detects a missile launch from near the Rocky Mountains area that soon hits Alpha Base. Suspecting a launch aimed at Beta Base, The Project orders an evacuation of Beta Base.
As Team Beta prepares to evacuate Beta Base, the Collective launches a massive attack on Beta Base, unaware of the impending nuclear attack. The Project races to evacuate as many troops as possible while defending against the Collective\'s attack. As Beta Base is destroyed and the evacuees head off to meet Team Gamma, Campaign Two ends.
Campaign Three

Campaign Three begins with the commander and his forces landing in an unoccupied area near Gamma Base. After setting up a base, the commander is attacked by Nexus forces. Further, the commander discovers that Nexus possesses technology capable of taking over control of Project units and destroying Project structures by hacking into their computer systems.
Soon, Gamma Base sends out a distress call requesting relief from attacks by Nexus. After fighting past Nexus forces to get to Gamma Base, Nexus reveals that they have completely taken over Gamma Base, and the Project is forced to destroy it.
As this happens, Nexus explains its history. It had a military contract to develop the synaptic link technology, but after years of research and little progress, the Synaptic Link project is shut down. The leader of the program, Dr. Reed, hacked into NASDA and takes revenge by causing the Collapse. He plants his consciousness into a virus called the Nexus Intruder Program.
Campaign Three continues with a massive escalation in conflict. The Project learns that Nexus has gained control of a missile base in the Rocky Mountains region, and attacks it. Although the attack is successful and the facility destroyed, the Nexus sets the missiles to detonate in their silos and the commander races to find shelter from the impending impact.
After the explosion, the commander returns to base, and receives a distress call from the survivors of the earlier attack on Alpha Base. Once rescued and found to be free of Nexus absorption, Team Alpha reveals a small base they constructed and gives control over to the commander.
Nexus then announces that it has gained control of the laser-equipped satellites and begins using them to fire upon the Project\'s forces. Fortunately, the orbits of the satellites are unstable, so the firing is inaccurate. Project HQ declares that these satellites must be eliminated before they compromise the Project. Another nearby missile base is located and captured, but Nexus has stabilized the satellites\' orbits and declares that firing will be precise and deadly. As Project researches race to crack the missile launch codes, Nexus laser satellites and ground forces unrelentingly attack Team Gamma.
The Project finally cracks the missile launch codes and launches missiles destroying Nexus\' laser satellites. With the laser satellites gone, the Project launches a final attack on Nexus headquarters.
Timeline
2050: NATO alliance collapses in face of growing nationalism and unrest in Europe.
2075: Nationalist unrest in Eastern Europe and Asia leads to nuclear attacks by terrorists.
2075: Synaptic Link research begins.
2077: Mongolia attacks China.
2079: Korea allies with Mongolia.
2080: Synaptic link patented. First cyborg soldiers developed.
2080: NASDA (the North American Strategic Defense Agency) formed to protect North America from nuclear attacks.
2081: NASDA begins building a satellite defense array.
2082: The NASDA satellite system comes on line.
2085: During routine testing the NASDA system malfunctions and launches nuclear strikes against all major cities in the world. The target countries respond with nuclear counter strikes. NASDA fails to defend against incoming missiles.
2086: Nuclear Winter begins. Widespread plagues and famines kill billions of people. Civilization ends. NASDA systems lie dormant following electromagnetic pulses. A group of survivors discover an abandoned subterranean military base. They set up home there and begin The Project.
2099: The Project emerges from it\'s military base.
2100: The Project begins its search for pre-Collapse technologies.
',
'title' => 'Story',
'titlebar' => '» Story',
'cachedsb' => '- Story
- Timeline'
),
'experience' => array(
'autogen' => TRUE,
'title' => 'Unit experience',
'titlebar' => '» Unit experience',
'text' => '
See also: Multiplayer rankings
Unit experience table
| Kills required
(Normal unit) | Kills required
(Commander) | Speed | Accuracy | Enemy
Accuracy | Damage
Taken |
 Rookie Rookie | 0 | 0 | +0% | +0% | −0% | −0% |
 Green Green | 4 | 16 | +5% | +5% | −5% | −6% |
 Trained Trained | 8 | 32 | +10% | +10% | −10% | −12% |
 Regular Regular | 16 | 64 | +15% | +15% | −15% | −18% |
 Professional Professional | 32 | 128 | +20% | +20% | −20% | −24% |
 Veteran Veteran | 64 | 256 | +25% | +25% | −25% | −30% |
 Elite Elite | 128 | 512 | +30% | +30% | −30% | −36% |
 Special Special | 256 | 1024 | +35% | +35% | −35% | −42% |
 Hero Hero | 512 | 2048 | +40% | +40% | −40% | −48% |
If you recycle an experienced unit, in addition to gaining 50% of its price back, the next unit you manufacture will gain its experience. This doesn\'t have to be one at a time: You can recycle an army, then later manufacture a new army with the old army\'s experience.
Note that your "saved" experience will not be kept across campaign missions – if you do not manufacture new units before you win the current mission, the experience will be lost.
Commanders
Commanders increase the experience bonuses of units they command.
Campaign
If a unit has a commander, it gets bonuses as if its level were the maximum of its own level, or its commander\'s level.
For instance, if a Regular unit has a Professional commander, it gets bonuses as if it were a Professional unit. If a Special unit has a Professional commander, however, it would still get bonuses as a Special unit.
Multiplayer
If a unit has a commander, its effective level is the maximum of its own level, or one level higher than its commander\'s level. Commanders also only need half as many kills as they do in campaign (the table).
',
'cachedsb' => ' - Unit experience table
- Commanders
- Campaign
- Multiplayer
'
),
'keyboard' => array(
'autogen' => TRUE,
'text' => '
These are the default keyboard shortcuts. If you have customized your key mapping, your shortcuts may be different.
Game
Multiplayer communication
| Enter | Send message |
|---|
| Alt+H | Drop beacon |
|---|
Unit selection
Groups
| Ctrl+[number] | Assign group [number] |
|---|
| [number] | Select group [number] |
|---|
| Alt+[number] | Select commander [number] |
|---|
By type
| Ctrl+U | Select all units |
|---|
| Ctrl+Z | Select all similar units |
|---|
| double-click | Select all similar units |
|---|
| Ctrl+S | Select all units on screen |
|---|
| Ctrl+D | Select all heavily damaged units |
|---|
| Ctrl+A | Select all attack units (units with weapons) |
|---|
| Ctrl+V | Select all VTOLs |
|---|
| Ctrl+H | Select all hover units |
|---|
| Ctrl+W | Select all wheeled units |
|---|
| Ctrl+F | Select all half-tracked units |
|---|
| Ctrl+T | Select all tracked units |
|---|
Unit orders
| Ctrl+click | Queue order * |
|---|
| NUM0 | Open orders menu |
|---|
| right-click | Open orders menu |
|---|
| / | Do or Die! (Do not retreat automatically) |
|---|
| . | Retreat at Heavy Damage |
|---|
| , | Retreat at Medium Damage |
|---|
| F | Fire at Will |
|---|
| E | Return Fire |
|---|
| C | Hold Fire |
|---|
| S | Hold Position |
|---|
| P | Pursue |
|---|
| Q | Patrol |
|---|
| I | Optimum Range |
|---|
| U | Long Range |
|---|
| R | Return for Repair |
|---|
| Ctrl+R | Return for Recycling |
|---|
* "Queue order" means that when you Ctrl+click, the unit will do what it would do if you had clicked, but it will do it after it\'s finished what it\'s currently doing. You can hold down Ctrl and tell the unit to do a whole bunch of things, and it will do them in order.
Game control
| Ctrl+= | Increase game speed |
|---|
| Ctrl+− | Decrease game speed |
|---|
| Ctrl+Alt+scroll up | Increase game speed |
|---|
| Ctrl+Alt+scroll down | Decrease game speed |
|---|
| NUM. | Toggle sound |
|---|
View
| B | Center view on Command Center |
|---|
| F12 | View location of previous message |
|---|
Camera control
| scroll up | Zoom in |
|---|
| scroll down | Zoom out |
|---|
| NUM+ | Zoom in |
|---|
| NUM- | Zoom out |
|---|
| Backspace | Snap (rotate) view to North |
|---|
| NUM8 | Pitch back (rotate up) |
|---|
| NUM2 | Pitch forward (rotate down) |
|---|
| NUM5 | Reset pitch (reset vertical rotation) |
|---|
| NUM4 | Rotate left |
|---|
| NUM6 | Rotate right |
|---|
| space | Tracking camera (follow selected unit) |
|---|
Interface
| Z | Toggle sensor display |
|---|
| F10 | Take screenshot |
|---|
| Shift+Tab | Toggle radar colors |
|---|
| Ctrl+Tab | Toggle radar terrain |
|---|
| Tab | Hide/show interface |
|---|
',
'title' => 'Keyboard shortcuts',
'titlebar' => '» Keyboard shortcuts',
'cachedsb' => '- Game
- Multiplayer communication
- Unit selection
- Unit orders
- Game control
- View
- Interface'
),
'rebalance' => array(
'autogen' => TRUE,
'text' => '
The Rebalance Mod is a mod of Warzone 2100 written by Zarel. It aims to improve the balance of Warzone.
Rebalance Mod for 2.2 or higher:
Rebalance Mod for 2.1:
In Windows, the easiest way to install a multiplay mod is to move it into:
C:/Program Files/Warzone 2100/mods/multiplay/autoload/rebalance_0.5.1.wz
(You may have to create the "autoload" folder in "multiplay" first.)
To temporarily disable a multiplay mod, move it out to:
C:/Program Files/Warzone 2100/mods/multiplay/rebalance_0.5.1.wz
Refer to the FAQ for installation information.
In other platforms, mods must be enabled with command-line options.
0.6.0 - 2009 Oct 11
- NO LONGER SUPPORTS 2.1
- Multi-turret no longer available for standard heavy bodies
- Most projectiles 1.5x faster. Should reduce sync problems
Renames:
- Mini-Rocket Artillery renamed Mini-Rocket Array
- MRL Emplacement renamed Mini-Rocket Battery
- Angel Missile renamed Seraph Missile Array (should eliminate the "angel missile won\'t fire!" complaints)
- Angel Missile Battery renamed Short-Range Missile Battery
VTOL balance:
- Hurricane damage increased 40 -> 50, splash increased 10 -> 30
- Cyclone damage increased 50 -> 70, splash increased 40 -> 60
- Whirlwind damage increased 50 -> 65, splash increased 30 -> 50
- Avenger and Vindicator damage increased 320 -> 350, accuracy increased 60%-70% -> 70%-80%
- Stormy damage increased 140 -> 180
- All lasers now have 80%-80% accuracy
- Plasmite Bomb weight increased 8000 -> 12000
- Mini-pod can hit air
Late-game stalemate-busting:
- Artillery to hover multiplier decreased from 110% to 100%
- Artillery to tracks multiplier decreased from 65% to 50%
- Artillery to half-tracks multiplier decreased from 80% to 70%
- Artillery to wheels multiplier decreased from 95% to 90%
- Anti-tank to hover multiplier decreased from 100% to 90%
- AP to hard multiplier increased from 45% to 50%
- Seraph (see "Renames") range increased from 5-11 to 5-14
Truck rush prevention:
- Command Center must be built before MG tower can be researched
- Truck HP decreased 50 -> 25
- Truck weight increased 600 -> 800
Structure research price cuts:
- Inferno bunker research price 150 -> 125
- Plasmite bunker research price 150 -> 125
0.5.1 - 2009 May 7
- Fixed crash when starting in T2 or T3.
0.5.2 - 2009 July 20
- Updated to make it compatible with version 2.2.
0.5.1 - 2009 May 7
- Fixed crash when starting in T2 or T3.
0.5.0 - 2009 May 7
- Heavy VTOL bombs made lighter, light VTOL bombs made heavier.
- VTOL bomb accuracy upgrades changed to damage upgrades.
- Angel Missile stronger, Archangel Missile weaker, both fewer prereqs.
- Damage upgrades now also upgrade splash and burn damage.
- Needle Gun slightly stronger. Still not actually better than HPV.
- Rails now penetrating weapons. In practice, this shouldn\'t make much difference.
- Factory, Cyborg factory, and VTOL factory upgrades combined; now only 4 upgrades instead of 6-9 each.
- Repair facility upgrades condensed, now only 3 upgrades instead of 6.
- Artillery weapons do less damage to tanks, but more to walls.
- MG damage back down to original levels. The extra APDSB MG Bullets in the early game does plenty to compensate.
- VTOL HP actually makes sense now.
- Cannon HP increased a bit more.
- Stormy nerfed.
- All AA weapons have full fire-on-move.
0.4.2 - 2009 Apr 14
- VTOLs partially fixed. Feedback welcome.
- Cannons and rails have more HP.
- Assault/Twin Assault Cannon slightly weakened (still much stronger than 1.10 and 2.1; stop worrying). TK also weakened.
- All weapons that do splash damage will always do splash damage, none of this 25% chance of doing splash damage b.s.
- Rails do splash damage now, and are worth upgrading to now.
- Angel Missile! Now a viable replacement for MRL!
- Heavy cyborgs are slightly lighter. Should be able to move now.
- Truck builds slower. Truck rushes aren\'t nearly so effective now.
- The rest of the structure prereqs are gone.
- Research tree reworked. Rockets/missiles have an easier time upgrading now. Pulse Laser isn\'t hidden behind GTE anymore.
0.4.1 - 2009 Mar 30
- Howitzers, incendiary artillery, and T3 weapons strengthened
- All weapons have same damage upgrade progression (25%) and one of two rate upgrade progressions (10% or 15%). This is down from an average of 30% and 20%, respectively. This is intended to make weapon choice matter more.
- Cyborgs further balanced. Not only should they be usable, they should be fairly well balanced within themselves now (Next: VTOLs!)
- Ranges rounded off to multiples half-tiles, except the Wide Spectrum Sensor Turret, which is still 17.7 tiles.
0.4.0 - 2009 Mar 23
- Cyborgs no longer have to be researched.
- Cyborg factory only requires Engineering now.
- Trading up weapons offers more of a benefit.
- Weapon multipliers massively rearranged.
- Cannons/Rails split from Rockets/Missiles, no longer both anti-tank.
0.3.0 - 2009 Mar 7
- Pulse Laser replaces Flashlight, instead of Heavy Laser.
- Flashlight Hardpoint replaced with Pulse Laser Hardpoint.
- Pulse Laser Emplacement replaced with Pulse Laser Tower.
- Body prices updated to make more sense.
- Some graphics replaced to make more sense.
0.2.4 - 2009 Feb 20
- Structures reworked so none of them have more than 2x the amount of HP they had in 1.10.
0.2.3 - 2009 Feb 17
- Lancer bunker replaced with lancer tower.
- Flamers strengthened.
0.2.2 - 2009 Feb 13
- After a balance test, lancers weakened, cannons strengthened.
0.2.1 - 2009 Feb 6
- 2.1 support is back. It was the lack of naval unit support that made it crash.
- Tweaked multipliers some more.
- Pulse laser tower removed until I figure out a way to fit it in.
0.2 - 2009 Jan 19
I haven\'t been keeping track of specific changes. Suffice to say it does these main things:
- Mediate 2.1\'s balance with 1.10\'s balance.
- Ensure no weapon is useless.
- Have cycles of strengths/weaknesses ("Rock-paper-scissors" style balancing)
- Remove inconsistencies.
0.1.1 - 2008 Nov 23
Fixes:
- Much smaller
- Restored compatibility with r6437 and most future changes
0.1
Research balance (Mediate 2.1 with 1.10):
- Lancer has fewer prereqs (but more than 1.10)
Research balance (other):
- Heavy Cannon requires APFSDS Cannon Shells
- Machinegun upgrades are back through Depleted Uranium MG Bullets
- Rocket upgrades are 20% instead of 10%
- No structure costs more than half its prerequisite turret to research
- Stormbringer easier to get
- Laser prereqs rearranged a lot
- Advanced Missile Warhead no long prereqs Avenger SAM
New Technology:
- Added Sensor Upgrade Mk3
Weapon balance (Mediate 2.1 with 1.10):
- Assault guns and twin assault guns are slightly more powerful (but less than 1.10)
- Mini-pods, rockets, and missiles have less HP (but more than 1.10)
- Mini-pods do slightly less damage (but more than 1.10)
- Rockets and missiles do more damage (but less than 1.10)
- Ripple Rockets do less damage (but more than 1.10)
- Flamers slightly nerfed (still way more powerful than 1.10)
- Cannons and gausses have more HP (but less than 1.10)
- Cannons do less damage (but more than 1.10)
- Gauss Cannon does more damage (but less than 1.10)
- Mortars do less damage (but more than 1.10)
- LasSat reloads in 5 min instead of 8 (back to 1.10)
Weapon balance (other):
- Howitzer HP slightly increased
- Heavy Laser range slightly increased
- Plasma Cannon damage slightly increased, now anti-tank
- Pulse laser damage halved, ROF doubled
- Stormbringer weakened
- Stormbringer is now a thermal AA laser (instead of kinetic AA gun)
- All lasers have very high velocity
- AA guns have increased velocity
- SAMs are more powerful
- Phosphor, Plasmite, and Thermite bombs are now thermal
- Plasmite bomb does more damage
- Missile Fortress nerfed

To the extent possible under law, Guangcong Luo
has waived all copyright and related or neighboring rights to
Rebalance Mod for Warzone 2100.
This work is published from
United States.
',
'title' => 'Rebalance Mod',
'titlebar' => '» Rebalance Mod',
'cachedsb' => ' - Download
- Installing
- Changelog
- License'
),
'orderingunits' => array(
'autogen' => TRUE,
'text' => '
Unfinished page
Using Units
Gotten used to the interface? Okay, well, time to actually use our units.
Selecting and moving units
To select a unit or cyborg, left click on it. Multiple units can be selected by clicking and dragging, and encasing the units in the drawn \'square\', or by holding down Ctrl or Shift and clicking on multiple units.
To move selected units, left click on the terrain of the map. This can also be done over black areas of the map to explore the area. To attack an enemy unit, left click on it. You can deselect a unit (or a group of units) with a right-click.
Queuing and waypoints
You can set a path with waypoints, which units will visit each waypoint in order. You can also select a queue of enemies for units to attack. Hold Shift or Ctrl while selecting units or clicking places to move.
This also works for queuing construction of Oil Derricks and/or structures in a chain - hold the key down while building the structures one by one, then, when building the final structure, release the key.
Groups of Units
To make groups of units, select the units you want and press Ctrl+[number] to make a group. A group of units will have a number next to it. To select a group of units you have made, press [number]. Groups can also be selected by double-clicking a unit in a group. To center the camera on a group, press the [number] twice.
Defending
Click a friendly structure or truck with weapon units selected (the cursor will be a shield) and the units will move to guard it.

Right-click on a unit (or select a unit and hit NUM0 on the numeric keypad), and a unit orders menu will appear above the command panel. This contains options to configure a unit\'s behavior.
Right-clicking on a factory will customize the orders of all future units that that factory produces.
Attack range

| Optimum Range: | Fires at most accurate range (default) |
| Short Range: | Moves to short range and attacks |
| Long Range: | Attacks at long range |
Retreat threshold

| Do or Die: | Your unit will not retreat unless ordered to. (default) |
| Retreat at Medium Damage: | Your unit will retreat (return to repair facility, HQ, or LZ) at medium (yellow) damage |
| Retreat at Heavy Damage: | Your unit will retreat at heavy (red) damage |
Firing

Fire At Will: Fires at any enemy (default)
Return Fire: Only fire if fired at
Do Not Fire: Units will not fire
Movement

Patrol: Moves in a circle on a position. Just click an area after selecting it.
Pursue: Pursue enemy.
Guard: Stay near an area or structure. (default)
Hold Position: Do not move under any circumstances.
Return

Return for Repair: Unit will return to a Repair Facility
Return to HQ: Unit will return to Command Center or LZ (campaign)
Go To Transport: Unit will go and board transport
Recycling

Recycling a unit will send it to the nearest Repair Facility or Factory, and destroy it. Half the power used in making it will be refunded to you. The unit\'s experience level will be placed in the next unit that is manufactured.
Unit experience
See also: Unit experience
Units have experience levels depending on how many kills the unit has. A higher experience level means that a unit is more accurate, moves faster and takes less damage. An icon displaying a unit\'s rank is displayed next to the unit\'s health bar.
Hardpoints and bunkers
Hardpoints, bunkers, and other defensive structures cannot be ordered to shoot directly.
However, you can assign artillery emplacements to a sensor tower. Nearby commanders with the \'indirect fire support\' option activated will also command these structures.
Indirect-fire units and sensors
See: Sensors and artillery
« Prev | Next »
',
'title' => 'Ordering Units',
'titlebar' => '» Basics » Ordering Units ',
'cachedsb' => ' - Using Units
- Unit orders menu
- Unit experience
- Hardpoints and bunkers
- Indirect-fire units and sensors'
),
'commanders' => array(
'autogen' => TRUE,
'text' => '
Unfinished page
Commanders

Command turrets are used much like sensors, except they can command any attacking unit, not just artillery. They are limited to having 6 non-artillery attacking units assigned to them at first, but this limit rises by 2 each time the commander gains a rank, which happens relatively quickly.
Command turrets provide an accuracy, armor, and movement speed bonus to all units assigned to them.

The Commanders panel. Note the similarity to the Unit Orders panel.
Prerequisites
Commanders require you to research the Commander technology.
Attaching
To attach a unit to a Commander, select a unit, then left-click the Commander you want to attach the unit to. A symbol will appear next to the unit to signify it is attached.
Limits
Be warned, however; Commanders have a limit to the amount of direct-fire units (eg machineguns) which is affected by their own experience level. Levels are earned by the Commander reaching 2 kills, 4, 8, 16, 32, 64 and so on. Each experience level allows the Commander 2 more direct-fire units. However, a Commander can have as many indirect-fire units as it wants.
Detaching
To detach a unit from a Commander, select the unit you want to detach, hold the Control key, and give the unit a new order (eg. move).
Targeting a unit
You can designate a target by selecting a Commander and right-clicking a unit. This allows any attached units to have greater accuracy when firing on a targeted unit.
Commander Unit Command Centre
A Commander Unit Command Centre is similar to a Unit Command Centre, but there are extra buttons.
Factory Assignment

The Commander Factory assignment buttons
You can assign a factory to a Commander. This makes a factory manufacture units and automatically assign them to the Commander�s group. To do so, bring up the Commanders menu by left-clicking the Commander and opening the Commanders menu, or right click the Commander, and click the factory NUMBER at the bottom of the Command Console. You can find a factory number by looking at the number on the factory in the Manufacture Fast Find bar. There are three rows of these numbers � the top is normal Factories, middle; Cyborg factories, bottom; VTOL factories.
Going for repairs, BRB
A unit that retreats from the battle to go to a repair facility, will stay connected to it�s Commander group. When it is done repairing, it will return to the Commander.
Indirect fire support

The indirect fire support icon
You can assign all the indirect fire pits and emplacements to a Commander�s designated target, also known as �fire support�. To do so, simply select a Commander, open the Commanders menu, and select the above icon. To cancel it, select the same button, or assign the fire support to another commander.
',
'title' => 'Commanders',
'titlebar' => '» Basics » Panel » Commanders',
'cachedsb' => ' - Commanders'
),
'faq' => array(
'autogen' => TRUE,
'cachedsb' => ''
),
'campaignstrategy' => array(
'autogen' => TRUE,
'text' => '
Before we begin our walkthrough, let\'s first go over some general strategy that will apply to all campaign missions.
1. Use all of the mission timer
All stages (save the first, the last, and the first half of Alpha 3) have a timer on them. In some stages, you\'ll find yourself wishing you had more time, and on others, you will think you had "too much". Trust me, there is never too much. Whether just letting your cash tick up, recycling-replacing your forces with new technologies, or setting up defenses at key locations (for base-missions anyway), you can use the extra time on one mission to make your life on further ones easier.
But mostly, the reason you want to prevent stages from ending is so that you can research all the techs you get in a given stage. Falling behind in this can lead to your finding out that you really wish you had access to something in the next stage, but you\'re still an hour\'s research away.
2. Retreat at X damage
Units in this game accrue experience as they shoot enemies (and commanders get it from anything their attached units shoot). Experienced units end up being quite a bit better than their inexperienced equivalents.
In a multiplayer game, this is usually not too useful, as most MP competitors know to specifically strike against high-experience units first; but against the AI in the campaign, having a force of heroic tanks is amazing.
One of the orders you can give to your units is for them to retreat if their health gets too low (50%/red, or 75%/yellow, specifically). The units with higher HP around them will protect them as they retreat. In most circumstances, Retreat at Medium Damage is the best setting.
3. Save often
Like many games, saving before doing something is a good way to make sure you don\'t do something... you regret. This game has a number of twists in it, twists that, even if you read this guide, you will find yourself wishing you had prepared for. I recommend no less than 3 save games; one you take right at the start of a stage, one that you keep saving over as the stage progresses, and one right when you start "milking" a stage\'s timer after completing the objectives. With these three handy, you should never be in a position where you find yourself saying "oh crap, I needed to start handling this half an hour ago!".
« Prev | Next »
',
'title' => 'Campaign strategy',
'titlebar' => '» Walkthrough » Campaign strategy',
'cachedsb' => ' - 1. Use all of the mission timer
- 2. Retreat at X damage
- 3. Save often'
),
'orderingvtols' => array(
'autogen' => TRUE,
'text' => '
Ordering VTOLs
VTOLs are used similarly to ground units. However, they do have a few differences. For one thing, they can fly...
Design and production

To produce VTOL units, you\'ll need the VTOL Propulsion and VTOL Factory researched, and a VTOL Factory built. You should also research and build a few VTOL Rearming Pads, otherwise, they won\'t be able to reload ammo.
Before you produce a VTOL unit, you must design it. VTOLs are designed the same way as regular units—simply select \'VTOL propulsion\'—but use slightly different weapons (more on that later).
VTOLs can only be built at VTOL factories. VTOL factories can be upgraded with factory modules—there\'s no need to research a separate "VTOL factory module".
Movement
After producing a VTOL from a VTOL Factory, it will fly and land on the rally point. VTOLs can be ordered to move and attack like any regular unit. Although they will fly over water and cliffs, they can\'t land on them.
Attacking
VTOL weapons differ drastically from the norm.
To attack with a VTOL, select it and click an enemy like normal. However, you may have noticed the white ammo bar below its health bar as you start attacking.
Unlike ground units, which reload automatically, VTOLs carry a limited amount of ammo. Once that ammo runs out, the VTOL can\'t attack until it refuels. A VTOL out of ammo will automatically find a VTOL rearming pad to rearm and repair itself (and will resume attacking once fully rearmed), or it can be manually rearmed by selecting it and clicking on a rearming pad.
VTOLs will not attack anything automatically. However, by selecting a VTOL and alt+clicking on an area, a VTOL will patrol the area between its current location and the clicked location, and attack anything in the vicinity. Alternatively, they can be assigned to VTOL strike towers and VTOL CB towers, which will cause them to function similarly to artillery assigned to sensor towers.
VTOL weapons
Most weapons have a VTOL equivalent, which does approximately twice as much damage, but has limited ammo. VTOL versions of regular weapons, like cyborgs, do not need to be researched separately.


In addition to VTOL versions of ground-based direct weapons, VTOLs can also use bomb weapons. These weapons are the equivalent of artillery, and are very powerful.
Defending against VTOLs


VTOLs are not ground-based units, so most ground weapons cannot hit them. They an only be hit by either anti-air (often abbreviated AA) (can only hit air) or versatile (can hit air or ground) weapons.
There are only a few weapons that are versatile: machineguns, lasers, and Mini-Rocket Pod. Rockets and missiles are also versatile, but only when mounted on a cyborg or VTOL. In addition to being uncommon, versatile weapons do not do as much damage to VTOLs as dedicated anti-air, so having some AA is recommended.
There are three types of dedicated AA. In order of powerfulness, they are: Flak (Hurricane, Cyclone, Whirlwind), SAM (Avenger, Vindicator), and Stormbringer.
Other orders
-
Patrol: In the Unit Orders box (right-click, remember?), there are a couple of new icons. Patrol will do the same thing as alt+clicking—move back and forth between its current location and the clicked location, and attack anything near its path, refueling when they need to before returning to defending.
-
Circle: In the Unit Orders box, next to Patrol, is the Circle button. Click it and then click an area of ground, and the selected VTOLs will take off and fly in a circle above the selected point. Like Patrol, they will attack anything that gets nearby, and refuel automatically.
« Prev | Next »
',
'title' => 'Ordering VTOLs',
'titlebar' => '» Basics » Ordering VTOLs',
'cachedsb' => ' - Ordering VTOLs
- Design and production
- Movement
- Attacking
- VTOL weapons
- Defending against VTOLs
- Other orders
'
),
'search' => array(
'autogen' => TRUE,
'cachedsb' => ''
),
'gettingstarted' => array(
'autogen' => TRUE,
'text' => 'Installing
If you do not already have a copy of Warzone, download it now:
System requirements
Warzone officially supports Windows XP or newer, Mac OS X 10.4 or newer, or a reasonably recent distro of Linux or BSD. Warzone may work on other operating systems, but we cannot say for sure.
Windows
To install Warzone 2100 on Windows, download the installer, run it, and click "Next" a bunch of times.
(You don\'t even need to click "I agree" anywhere - that\'s the beauty of open source.)
Mac OS X
Download the DMG from the download page, mount it, and drag the app to /Applications/.
Linux
On most distributions of Linux, Warzone should be available in your repositories. However, these are often outdated, and you are encouraged to compile Warzone yourself, which is the usual.
If you\'re new to installing from source on Linux, "the usual" refers to the process of downloading the tarball (from the download page), extracting it, opening the Terminal, cd-ing to the extracted directory, and running:
./configure && make
For more detailed information, or if the above fails, see the Linux Compile Guide.
Other OSes
Refer to the Compile Guide.
Running
Windows
On Windows, simply double-click the icon on your desktop. The game will run. To run the game with the included mods, go to "Start » Programs » Warzone 2100" and pick a mod.
Mac OS X
Double-click on the "Warzone" icon in /Applications/ (or use Spotlight, or drag it onto the Dock for easy access).
Notes:
- If you\'re on 10.4, you need X11 installed. X11 can be found on the install DVD.
- If you have a Nvidia-based Mac with Mac OS X 10.5.5-1.5.9, there is an Apple/Nvidia driver bug that doesn\'t allow textures to be shown. To fix it, please upgrade to OS X 10.6 (Snow Leopard).
Linux
This really depends on your distribution and/or desktop environment, but it should be wherever you installed it to.
Uninstalling
Windows
Either use "Start » Programs » Warzone 2100 » Uninstall" or Add or Remove Programs in Control Panel.
Mac OS X
Drag the Warzone icon in /Applications/ to Trash.
Linux
It really depends on how you installed it. Package manager? Use the package manager to uninstall it. Compiled it from source? Just delete the source directory.
« Prev | Next »
',
'title' => 'Getting started',
'titlebar' => '» Basics » Getting Started',
'cachedsb' => '- Installing
- Running
- Uninstalling'
),
'power' => array(
'autogen' => TRUE,
'text' => '

The power bar.

A spare oil resource, and a derrick hard at work.
Power
In real life, money is power, but in Warzone, power is money. You spend power to build structures, manufacture units, and research upgrades/new technology.
Getting Power
So how do you get power? Power is generated by Oil Derricks. However, you must have at least one Power Generator for every four Oil Derricks.
Oil derricks must be built on oil resources, but the generator can be anywhere on the map. Keep in mind that additional generators beyond one for every four derricks will provide no benefit.
Pricing
Icons in the Manufacture, Build, and Research menus will have yellow bars in them representing their price:
 Inexpensive weapon
 Expensive weapon
When you place your mouse over an icon, the power bar will have a green section, representing its price. If you cannot afford it, the power bar will instead turn red.
The amount of power you have is shown on the very left of the power bar. If you place your mouse over an icon, if you have enough power to get it, the number will show the amount of power it will cost. If you can\'t afford it, the number will show the amount of power you need to be able to afford it.
Power is drawn as soon as a the icon is clicked. Providing you have sufficient power for the activity, the initial progress bar fills quickly with green (slower with more costly actions) and the construction or research begins. A yellow progress bar then charts the progress achieved by the current activity.
Upgrades

Power Generators can have a Power Module built on top of them to squeeze out more power. Power Modules need to be researched before you can build them. There are also several researchable upgrades available which increase the amount of power you recieve.
« Prev | Next »
',
'title' => 'Power',
'titlebar' => '» Basics » Power',
'cachedsb' => ' - Power
- Getting Power
- Pricing
- Upgrades'
),
'interface' => array(
'autogen' => TRUE,
'text' => '
The interface can be turned on or off with Tab.
Key
-
Messages (top): The message bank. This keeps all the last few messages given to you by the game. To see more of your most recent messages, press the `/~ key (This is the backtick/tilde key; usually found between Esc and Tab).
-
Time remaining (top right): The time limit. This is only seen during Campaign. If this goes down to zero, you lose!
-
Command panel (bottom left): The command panel.
-
Power (bottom): The power bar.
-
Map (bottom right): The minimap.
« Prev | Next »
',
'title' => 'Interface',
'titlebar' => '» Basics » Interface ',
'cachedsb' => ''
),
'commandpanel' => array(
'autogen' => TRUE,
'text' => '
There are six different command panel interfaces, plus a central button. You open up a command interface by pressing the appropriate button.
The middle button closes any open command interface.
« Prev | Next »
',
'title' => 'Command panel',
'titlebar' => '» Basics » Command panel',
'cachedsb' => ''
),
'transports' => array(
'autogen' => TRUE,
'text' => 'Unfinished page
Transports
Transports are used during the campaign to transport units from one sector to another (known as \'Away Missions\'). In multiplayer, they\'re used to transport cyborgs from one part of the current map to another.

A transport with some units loaded in. The transport menu is open.
Campaign
Loading Units
To load units into a transport, select the desired units and click the transport. Only 10 units can occupy a transport at one time. The number of units you have loaded can be seen in the top left of the screen, next to the launch button.
Opening the Menu
To open a transport\'s menu, click the transport itself. In the screenshot, the menu is open.
The units already in the transport are listed to the right.
Launching a Transport
To launch a transport, click the button in the top left corner of the screen. The transport will launch, and proceed to the destination.
Away Missions

Hunkered down at the landing zone.
Arrival
When you arrive at the destination, the transport will drop off the units you loaded into the transport and fly away.
Normal Base Operations
During away missions, you can still research, manufacture and design units. Simply do it as you would normally, and it will happen back in the base area. You can only build with trucks you have under your control, though. Remember you\'re on an away mission, and in some missions, you won\'t get reinforcements, so stock well.
Requesting Reinforcements!
On missions where you CAN request reinforcements, the transport button should be at the top left of the screen. Click it, and you\'ll see the transport menu, with one little twist - all the units you left at home alone are on the right side of the screen.
To load units into the transport, click them, and they\'ll be moved from the right side of the screen to the left. To launch, hit the launch button again. To close this screen, hit the middle button on the Command Panel.
Your units will be on their way. The timer next to the Transport button will have the time remaining until your units get to your location.
Take Me Home
Once your units are on an away mission, they\'re not going home until the mission is completed, or you\'ve gotten them killed. I think they\'d prefer the earlier option.
Multiplayer
The use of transports in Multiplayer is much more limited in comparison to Singleplayer.
Cyborg Transport
The only type of transport available in Multiplayer is the Cyborg Transport. As you may or may not have guessed by the name, it can only hold Cyborgs, no normal units or VTOLs allowed. Cyborg Transports can only be built by VTOL Factories with 2 modules attached, and the technology needs to be researched.
Loading
To load a cyborg into the transport, select it and click the Cyborg Transport. The cyborg will load on.
Moving
The Cyborg Transport moves like a normal VTOL - select it and click on a piece of terrain to move it. It will take off and land at the place you selected.
Unloading
The interface used by the Cyborg Transport is a watered-down version of the Transport interface. To open it, right click the transport. The cyborgs loaded on will be displayed on the left. To boot out a cyborg, click it (while landed, we don\'t want them falling, do we? :) ).
Destruction
Cyborg Transports have no weapons, and so are sitting ducks for AA turrets and hardpoints. If a Cyborg Transport is destroyed and it has a few cyborgs on board, you\'ll lose them too. So be careful, OK?
',
'title' => 'Transports',
'titlebar' => '» Basics » Transports',
'cachedsb' => ' - Campaign
- Multiplayer'
),
'walkthrough' => array(
'autogen' => TRUE,
'text' => '
The walkthrough is incomplete.
For a more complete walkthrough, see New Walkthrough by themousemaster1, which is the walkthrough which I will eventually adapt into the current Warzone Guide.
Below is the unfinished, newer walkthrough:
Start walkthrough »
Before we begin, we might want to brush up on some basic strategies first.
Campaign 1 - Alpha
Your team is assigned to the Western Sector to locate and retrieve Pre-Collapse technology. Your main goal is to find the Synaptic Link Technology. The Western Sector is a barren wasteland with dry ground and little vegetation, broken up by ridges and plateaus. Because you\'re a new commander, you\'re assigned the easiest of the three sectors.
As a part of this campaign, first build a base, then explore the surrounding area for new technologies. You\'ll run into Scavengers and other enemies, so be careful. Some missions require you to take an away team to a distant area of the sector by transport. Even though you\'re away from your base, you can still give manufacturing orders and research new technologies.
Campaign 2 - Beta
Beta Team has established a base in the sector, but has done very little expansion. The Collective has declared war on the project and is determined to drive your forces from the sector. Your objective is to defend the base and then begin to eliminate this new enemy. You also must search for the VTOL (Vertical Take Off and Landing) Technology.
Campaign 3 - Gamma
Nexus has fired nuclear missiles at and destroyed Beta Base. Therefore, you must transfer your command to the Gamma Sector, in the cold, snow-covered Rocky Mountains. The key is to use the terrain to hide your units from the enemy while not getting ambushed in the process.
Nexus has all the latest and most powerful technology. Until you can capture and research some of it, your units will be at a disadvantage. The Project is depending on you, however. Your failure means the end for it.
',
'title' => 'Campaign walkthrough',
'titlebar' => '» Campaign walkthrough',
'cachedsb' => ' - Campaign 1 - Alpha
- Campaign 2 - Beta
- Campaign 3 - Gamma'
),
'camera' => array(
'autogen' => TRUE,
'text' => '
What is the Camera?
When Warzone was released in 1999, it was one of the first real-time strategy game to be in 3D. Now, most real-time strategies are in 3D, but, if you\'re not used to the new trend, let us help you along.
Basic Controls
-
Moving: To move where you\'re looking at, move the mouse to the edge of the window/screen, or use the arrow keys.
-
Rotating: To rotate the view, hold down the right mouse button, and move the mouse in any direction. (The view can also be rotated using 8 and 2 (up/down), or 4 and 6 (left/right) on the numeric keypad.)
-
Zooming: To zoom in or out, use the + or − keys on the numeric keypad, or use the mouse wheel.
Advanced Controls
-
Reset view to north: If your camera angle feels unnatural, pressing Backspace will reset your view to the north.
-
Set view to any direction: If you want to align the camera to a different direction, pressing Ctrl+[arrow key] will set your view to that direction.
-
Unit Tracking: Press Spacebar when units are selected, and the camera will follow them. Press Spacebar again to stop Unit Tracking.
-
Jump to base: Press B to center the view at your Command Center. Useful if you need to get back to base quickly.
-
Jump to squad: If you have a squad assigned with Ctrl+[number], you can quickly jump to that squad by pressing [number] twice.
« Prev | Next »
',
'title' => 'Camera',
'titlebar' => '» Basics » Controlling the camera',
'cachedsb' => ' - What is the Camera?
- Basic Controls
- Advanced Controls'
),
'minimap' => array(
'autogen' => TRUE,
'text' => '
What is the minimap?

The minimap is a very useful tool on the Warzone battlefield. It helps you keep track of your units and structures, your opponents units and structures (within range), and the map itself. Orders can be issued over the minimap, and it can be used to jump to part of the map very quickly.
The minimap is given after you build a Command Center.
Key
-
Faint-white trapezoid: This is a visual representation of your camera on the radar. The large end points towards where you\'re looking. The small end is where the camera is.
-
Transparent areas: Unexplored - will peel away as you send units into them. These areas are black on the screen.
-
Green area: Units or structures that belong to the green player (in this case, us).
-
Yellow/gray/black/red/blue/cyan/magenta area: Units or structures that belong to the yellow/gray/black/red/blue/cyan/magenta player (not pictured).
-
Red/white flashing area: Units or structures belonging to you that are under attack.
-
Green pulse: Artifact. Needed to research technologies in Campaign. In Skirmish/Multiplayer, can be found by destroying enemy base structures.
-
Red pulse: An enemy base or other point of interest. Only used in Campaign.
-
Blue pulse: A free oil resource.
Controls
-
Moving the camera: Right-click anywhere on the minimap to move the camera.
-
Giving orders: If you have units selected, click anywhere on the radar, and the units will carry out that order.
-
Zooming in and out: Hover your mouse over the minimap and move the mouse wheel up or down.
« Prev | Next »
',
'title' => 'Minimap',
'titlebar' => '» Basics » Minimap',
'cachedsb' => ' - What is the minimap?'
),
'manufacture' => array(
'autogen' => TRUE,
'text' => '
Unfinished page
Manufacturing
Manufacturing units is similar to building structures. The buildings that can build structures are Factories, Cyborg Factories and VTOL Factories.
Screenshots

1: Selecting a unit to be manufactured

2: The unit being manufactured
Building a Unit
To manufacture a unit, you need to press the Manufacture button. A Fast Find bar will open at the bottom of the screen, between the radar and the Command Panel.The bottom row of the two contains every Factory, Cyborg Factory and VTOL Factory built. Clicking it will zoom the camera to the structure.
To manufacture a unit, click the space above a factory. If this factory is capable of building a unit, it will appear in a menu on the left side of the screen.
A factory can only build a unit if the body of a unit is a certain type (unit/cyborg/VTOL), and if the factory has enough modules applied.
Queueing Units
You can build up to nine units by repeatedly clicking the unit. You can also right-click the unit to lower the amount of units to build � right-clicking on a unit with no units queued will set the queue to 9.
Building Status
While a unit is building, the Fast Find bar above the factory building the unit will be displayed. If the bar is green, the unit is gathering power to build the unit. If the bar is yellow, the unit is building.
Rally Points
When the unit is done building, it will spawn next to the factory, then proceed to a rally point. A rally point is created when a factory is made. Right-clicking on the factory in the bottom Fast Find row will centre the camera on a spawn point. Clicking a rally point will allow you to move it in a similar way to building a structure. Please note that moving a rally point while a unit is moving to one will not affect it�s path.

Rally points (clockwise, from top left): Cyborg rally point, Factory rally point, Repair Facility, VTOL rally point
Looped production
You can also set looped production by left and right clicking the loop button in the left column near the top. This repeats the build sequence you set the amount of times shown next to the button. This can be set to infinite by right-clicking when the number reads zero.
« Prev | Next »
',
'title' => 'Manufacture',
'titlebar' => '» Basics » Panel » Manufacture',
'cachedsb' => ''
),
'research' => array(
'autogen' => TRUE,
'text' => 'Unfinished page
Research
Researching technologies is very simple. You can only research technologies with Research Facilities.
Screenshots

1: Selecting a topic to research

2: The topic being researched
Researching
Single Player
In the single player game, you collect Artifacts from enemies and research them. Artifacts are small white boxes with a wrench above them, and can be collected by any unit by moving to it.
Multiplayer/Skirmish
In Multiplayer/Skirmish games, you progress along a �tech tree� - a couple of topics can be researched, which in turn will unlock more technologies - also referred to as progressing \'up the tech tree\'.
Researching a topic
When you open the Research menu, a Fast Find menu with two rows will appear at the bottom of the screen. All your research facilities are shown on the second row. Clicking a research facility will zoom the camera to it.
Clicking the blank icon above a facility will show a set of icons on the left. You can hold the mouse over an icon to see it�s name. Click an icon to start researching it. Only one center can research one technology at a time.
While a facility is researching, it displays a bar in it�s Fast Find area. If the bar is green, the facility is gathering power. If it is yellow, the topic is being researched.
Research Completion
When research is completed, the game will inform you by a message and playing a sound � �Research Completed�. If it was a major technology advancement, an entry will be made in the Intelligence Display. You can check the entry for more information about the research.
Research Upgrades
You can research a Research Module during the course of the game. To apply it, select a truck and left click a non-upgraded Research Center, and the truck will build it. However, the topic you are researching will be stopped until the module is built - it\'s your choice to let it build or wait. Other upgrades are also available for Research Centers, but these don\'t make you wait to apply an upgrade to a building.
« Prev | Next »
',
'title' => 'Research',
'titlebar' => '» Basics » Panel » Research',
'cachedsb' => ''
),
'build' => array(
'autogen' => TRUE,
'text' => 'Unfinished page
Building
Building structures is absolutely vital in Warzone - from Factories to build units, to Research Centers for researching new technology.
Building can be done with units with Trucks as turrets and Combat Engineers.
Screenshots

1: Selecting a structure to build

2: Selecting an area to build the structure
Building
Building a Structure
To build, you need to select Build on the Command Panel, and this will bring up two rows of icons on the bottom of the screen, between the Command Panel and the Radar. These each represent one unit, either a truck or a Combat Engineer, that is able to build. Clicking the bottom row of icons will zoom the camera to the unit. The top row of icons will pull up a bar on the left side of the screen (diagram 1). The two columns of icons represent the structures you can build. Click a structure on the columns to select it for building. You can hold the mouse over an icon to see the structure�s name.
Selecting a location
When you select a structure, it closes the two menus (like clicking the middle button). A white square will appear in the world. This is where your structure will be placed. Move the square by moving the mouse. Click to place the build site for the structure. If the square is red, the structure cannot be placed. To build �walls� (when building defenses) you can click and drag the box to draw a wall.
Oil Derricks
Oil derricks can only be built on Oil Pools which aren�t on fire. Fires on Oil Pools will burn out over time. Oil derricks are built automatically if a truck is selected and you left-click an Oil Pool.
The unit you selected to build the structure will move to build the structure.
If you open the Build menu again, the unit�s status will be shown in the Fast Find bar. If there is a structure without a bar in the Fast Find top row above a unit, the unit is moving to the build site. If there is a green bar, it is accumulating power for building. If there is a yellow bar, it is building the site.
Repairing
You can assign a unit to repair a structure by selecting it and left-clicking a building.
Demolishing
Demolishing a building is nearly as simple as building one. Select �Demolish Structure� in the Structure menu and click a building to demolish. The unit will move to the building and destroy it, giving you half the power used in building the structure. Demolish Structure will always be available, from start of game to end.
Teamwork
You can assign extra trucks/cyborgs to a building to build it faster. Simply select a unit and left-click a structure, and the unit will move to the building and start helping construction.
Hardcrete and Tank Traps
You may wonder what the Hardcrete and Tank Traps do. Well, they do nothing. They just sit there and keep your units and enemy units from passing through.
« Research « Prev | Next » Design »
',
'title' => 'Build',
'titlebar' => '» Basics » Panel » Build',
'cachedsb' => ''
),
'intelligence' => array(
'autogen' => TRUE,
'text' => 'Unfinished page
Intelligence Display
While the Intelligence Display doesn\'t have a large purpose like the rest of the functions, it is still very useful indeed - it contains a record of all the technology you have researched.
Screenshots

Intelligence display with piece of intelligence selected
What\'s displayed
When you open the Intelligence Display, two rows of icons appear on the bottom of the screen. Selecting an icon will display information in the middle of the screen. This is helpful for looking at technologies you have researched. During Campaign, a piece of intelligence always displayed is your mission objective.
We Brake For Nobody
Please note that while the Intelligence Display pauses the game in Campaign mode, it doesn�t do so in Multiplayer and Skirmish!',
'title' => 'Intelligence',
'titlebar' => '» Basics » Panel » Intelligence',
'cachedsb' => ''
),
'alpha1' => array(
'autogen' => TRUE,
'text' => 'Alpha 1: Scavenger Raiders
Build a forward base
Time limit: unlimited
As may be expected, the first stage of this game is fairly easy. Wouldn\'t want to get people to quit playing before they begin. ;)
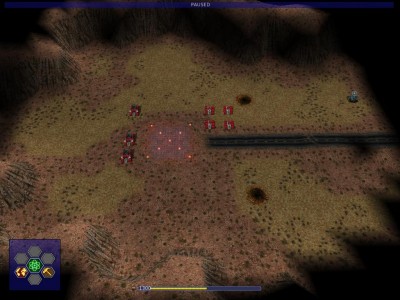
You should start with three Trucks and four Machinegun Viper Wheels tanks.
Not much of a base, eh? You\'ll have to build one yourself. Start by building a Command Center, a Factory, a Power Generator, and a Research Facility. As long as you don\'t go to far to the east, no one will attack you.
Once you move a truck to the east to build an oil derrick, however, small groups of Scavengers will begin to attack you. Your MG Vipers will have no trouble defeating them. Nonetheless, begin manufacturing some additional MG Vipers to assist them.
Search for scavenger outposts
Once you have dealt with the scavengers right outside your base, it\'s time to start exploring. Manufacture eight MG Viper Wheels, then send them north and east of your current position to attack the nearest scavenger settlement.
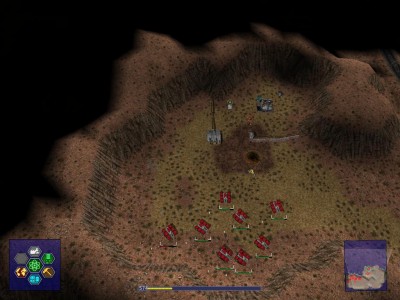
Once you have defeated this settlement (which shouldn\'t be very difficult), you\'ll find an artifact. Pick it up (click on it) and research it at your Research Facility. When the oil resource cools down, build an oil derrick there, too; it\'ll give you more money.
| | Price | Effect |
|---|
| Hardened MG Bullets | $18 | - Upgrades machinegun damage to 130%
|
You will want to recycle and rebuild any tanks that are in red or yellow health (don\'t worry, by the end of this stage, the option to repair vehicles will be available, so this whole repair-rebuild process isn\'t permanent).
Once your 8 tanks are battle ready again, head north.
Another small base; you should be able to destroy it easily. Upon demolition of this base, you will get the artifact for the Flamer turret. Using it or not is your preference; it will work very well in upcoming stages against almost anything, but its short range means it will also get most of the enemy fire centered on it, and its low HP means it will die quickly. By the time you find heavier bodies and armor to supply it with, you will also have other weapons you might like more, so.... as I said, use it or don\'t.
Again, recycle and rebuild your units, and get ready to move west.
This is the first time your units face a credible danger of being lost; be sure they are set to retreat at some level of damage (for now, Retreat at Low Damage is enough).
Once the base goes down, you will get a very useful artifact: the MG guard tower – your first defensive structure. Although it\'s called a Machinegun Guard Tower, it has a Heavy Machinegun on it, and will do more damage than your Machinegun tanks.
| | Price | Effect |
|---|
| Machinegun Guard Tower | $18 | - Gives new structure: Machinegun Guard Tower
|
And now, it\'s time for the last base.
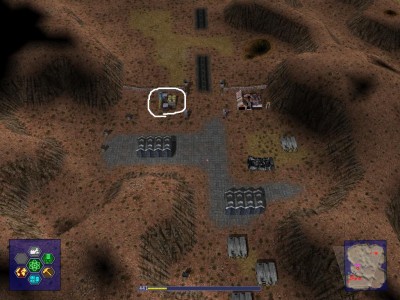
You\'ll want to avoid those flamer towers – they do high damage if you get close, but are harmless as long as you shoot them from far away.
You\'ll notice one of the buildings is circled. Don\'t shoot it. Order your units to Hold Fire so they only shoot things you explicitly tell them to attack, and destroy all the other buildings.
| | Price | Effect |
|---|
| Engineering | $37 | - Upgrades construction speed to 110%
|
| * Mobile Repair Turret | $18 | |
| * Tank Traps | $18 | - Gives new structure: Tank traps
|
Since there\'s still one enemy building left, the game won\'t end, and you can use your free time to research all of this. Build a repair turret tank, and repair all of your damaged units (no need to recycle again!) Now\'s your time to relax, build oil derricks anywhere you need to, and maybe fortify the southern edge a bit.
Once you\'re ready, move all your units to the southern end, destroy the last structure with a tank or tower, and it\'s time for Alpha 2!
« Prev |
| Next »
',
'title' => 'Alpha 1 - Walkthrough',
'titlebar' => '» Walkthrough » Alpha 1: Scavenger Raiders',
'cachedsb' => ' - Alpha 1: Scavenger Raiders
- Build a forward base
- Search for scavenger outposts
'
),
'artillerytactics' => array(
'autogen' => TRUE,
'cachedsb' => ''
),
'earlygamestrategy' => array(
'autogen' => TRUE,
'title' => 'Early-game multiplayer strategy',
'titlebar' => '» Early-game multiplayer strategy',
'text' => '
Ah, the early-game. Most games start out with very few choices, only branching off into multiple choices later on. The upshot of this is that the early-game is very well analyzed.
Tips
Before we begin, keep a few things in mind:
- Use your power. If your power rises above 500 in the early or mid-game, spend more of it! Research something, build some more research facilities, build a bigger army, defend your oil derricks... something!
- Never stop researching. If you stop, you will be more and more disadvantaged as time goes on, in every area.
- Get more derricks. Everything requires power! The more you have of it, the better. It\'s nearly impossible to win with only the four derricks in your base.
Building and exploring
Most players begin a multiplayer game in T1, No Bases. This starts them off with two trucks and nothing else. You can\'t win a game without having all four of the base structures, but what to build first?
-
Many players build a Factory first (or at least second). Factories produce additional trucks, which makes building the rest of the base much faster.
-
Research Facilities are also important. Unlike other games, Warzone starts with zero weapons researched, so Machinegun must be researched before you have any offensive capability at all. Without a research facility, you can\'t do anything but make trucks and base structures.
-
Command Centers are also required for most normal play - they are a prerequisite for any defensive structure research, and are required to design tanks.
-
Without a Power Generator, your initial supply of power will quickly run out. Start on those oil derricks as well.
As you are building up your base, you should send trucks out to capture oil resources around the map, as well as scouting for enemy activity. The four oil resources inside your base (on a standard map) will soon be insufficient, and you need to claim more to have a chance of staying in the game.
While you are exploring, you should start making Machinegun tanks or cyborgs to help defend your trucks.
Some possible orders to build your structures:

Researching
This section assumes that the reader has knowledge of Warzone\'s research system. If you do not, see: Research
In Warzone, without research, a player simply cannot survive in a game for very long. Every research is one more advantage you have against your opponent. It\'s an advantage that costs no money after it has been researched. It\'s an advantage that, unlike armies and structures, cannot be taken from you.
There\'s no need to worry about memorizing the research tree, of course. It may seem intimidating, but a player needs to know very little of it, and will quickly pick up what to research while playing the game.
Much of the research tree is completely optional. I\'ve won games without ever researching Machinegun. However, a few are completely necessary in competitive play. It\'s not that you can\'t win no matter what, but that if someone else has researched these, and you haven\'t, they have an insurmountable advantage.
But even within these "must-haves", there are different strategies about which to research first. Remember that the purpose of research is to gain an advantage on your opponent. But which advantage should you gain first? Offensive capability? Defensive capability? Economy?
Weapons
No matter if you choose to focus in offense, defense, or economy, you need to choose a few weapons to specialize in.
The first weapon you get in Warzone is the Machinegun. So if you want to tank rush as early as possible, the Machinegun is the only choice. However, if you have time to research a bit first, there are four viable early-game weapons:
- Twin Machinegun
- Light Cannon
- Flamer
- Mini-Rocket Pod
These all cost approximately $100 to research, total, and will take two to three minutes to research. The Mini-Rocket Pod costs slightly, but not noticeably, more than the others.

Getting the Twin Machinegun and going down the machinegun route will give you an early-game advantage. It\'s a generalist weapon, and you\'ll soon get the Heavy Machinegun. Many games can be won simply by focusing on this weapon.
Some players like to neglect research after getting the Heavy Machinegun; simply amassing these tanks and rushing the enemy. Note, however, that even at this stage, massed Heavy Machineguns are still vulnerable to massed Mini-Rocket Pod tanks and towers, and that if the rush fails, you will be at a very significant research disadvantage.

The Light Cannon is the start of the cannon tree. While the Medium and Heavy cannons don\'t show up as early as the Heavy Machinegun, they easily outclass it. Cannons are slower, heavier, more expensive, and have more HP than machineguns. They do more damage to armored tanks and armored structures, but less damage to cyborgs.
While Light Cannons can be used similarly to machineguns, the weight of the more powerful cannons slows them down enough that you must plan for this liability. Users of longer-ranged weapons, such as Lancers, can easily outrun you, and harass you from afar. In situations like this, seek to corner them where they cannot escape. If you are in open space, it may be best to ignore them, and continue on to your enemy\'s base, instead of wasting time chasing them, which will be a losing battle.

The Mini-Rocket Pod is the start of the rocket tree. It is a highly specialized weapon designed to fight tanks. It also does a little damage to unarmored structures such as the Machinegun Tower and some base structures, but is nearly completely ineffective against more armored structures, as well as cyborgs.
Mini-Rocket Pods are the longest ranged T1 direct weapon, and are fairly light, and this should be used to your advantage. Through attrition, a few of these can wear down a sizable army. If you encounter any cyborgs, however, you have no choice but to run.
Upgrading mini-rockets will eventually lead to the Mini-Rocket Array, a weapon that can deal with the cyborgs and walls that the Mini-Rocket Pod has trouble with.

Unlike the other weapons, the Flamer is traditionally used on cyborgs (and later, hovercraft). This makes them quite vulnerable to machineguns, but they are quite powerful against cannons and mini-rocket pods. Flamers do barely any damage to hardcrete walls and hardpoints, but significant damage to everything else, as long as you can get within range. Getting within range is a problem in the early game, as wheeled vehicles can match your speed, and slowly kill you with long-ranged weapons as they retreat.
Later on, as players start using the slower and heavier tracked and wheeled vehicles, and you start using hovers, flamers can catch up to and annihilate armies with their fire.

In addition to these four weapons, there is also the mortar, available a bit later. Mortars are long-ranged siege weapons, best used against enemy structures. Used defensively, they can help soften attacking armies, but should not be relied upon. When assigned to sensors, they have an extremely long range, but are vulnerable to enemy units, so they are best protected by other weapons that are more powerful at shorter ranges.
With these weapons, it is often to your advantage to go along multiple weapon paths, which will give you additional versatility. Mini-Rocket Pods and Heavy Machinegun form a popular combination, with the machineguns taking care of the cyborgs that the rockets would otherwise be helpless against. The flamers\' upgrade path is relatively inexpensive, and their ineffectiveness against early enemies makes them best paired with other weapons.
As the game goes on, you may want to start branching out into different weapon trees. Although the cannon and rocket trees are difficult to catch up on if you haven\'t been researching them since the early-game (and by corollary, you should be keeping up with at least one of those trees), most other weapons are fairly easy to get if necessary. In particular, lasers require no other weapon research, and are a good choice if you find yourself in T3 but falling behind in weapon research.
Offense
When playing offensively, it\'s important to upgrade your weapons. Each damage upgrade adds 25% to damage, and each rate-of-fire upgrade decreases reload time by 10% or 15%, and these can really add up. Fully upgraded cannons, for instance, have ten times as much damage rate as un-upgraded cannons.
Unless they unlock more powerful weapons, weapon accuracy upgrades should generally be avoided until there are no other upgrades, since they grant a negligible 10% (of base accuracy) bonus to accuracy.
Researching a new weapon type will generally unlock its damage upgrade. Automated Manufacturing (and its improved versions) is often needed to unlock rate-of-fire upgrades. Synaptic Link Data Analysis (and its improved versions) is often needed to unlock accuracy upgrades.
Unlocking stronger weapons usually requires researching damage upgrades. Exceptions include rockets (and later Scourge Missile), which require accuracy upgrades to unlock, and rotary weapons (such as Assault Gun or Pepperpot), which require rate-of-fire upgrades.
Armor upgrades are even more powerful, granting 30% more armor and 30% more HP. There are separate armor upgrades for tanks and cyborgs, so choose wisely.
Tank armor upgrades will unlock more powerful Project bodies, while engine upgrades will unlock more powerful New Paradigm bodies. New Paradigm bodies are faster and slightly less expensive, but Project bodies have more armor.
These upgrades will also unlock better propulsions, such as Tracks and Hover. Tracks offer increased health and armor in exchange for slower speed. Hovercrafts have only slightly more health, but are significantly faster than wheels.
Defense
Your first defensive structure is the Machinegun Tower. Despite its name, the weapon mounted on top of it is a Heavy Machinegun, which is quite a bit more powerful than the Machinegun tanks that you will be defending against.
Machinegun towers can also be used offensively. In Warzone, structures can be built anywhere. A player with no tanks can build towers next to enemy oil resources, to seize them, and next to friendly oil resources, to defend them. Using structures offensively is usually only viable very early in the game.
Other defensive structures can be found by researching Hardcrete Walls. Walls and defensive structures can be upgraded with Hardcrete upgrades, which are unlocked by researching walls, and later Improved and Advanced Engineering. Although these do not unlock anything until fairly late in the game, they upgrade armor by 35% and HP by 30%, making them one of the most significant automatic upgrades in the game.
No matter how defensively you play, you still need to upgrade weapons as well as structure armor.
Economy
While you are building and upgrading your structures and tanks, it\'s important to think long-term. While providing no direct benefit, every structure module available will give you an insurmountable long-term advantage:
- Engineering
- Fuel Injection Engine
- Cyborg Factory
- Sensor Turret
The usual order in which these are researched are:
-
The Power Module provides an extremely large boost (1.5x) to power production, and unlike other modules, power modules are free. It is perhaps the most important upgrade, and many players get it well before any other module.
-
The Factory Module allows for faster production, and production of medium (and heavy) bodies. It also unlocks vehicle and cyborg armor upgrades, and is vital if you don\'t want your tanks to stay Viper Wheels with no upgrades.
-
While the Command Relay Post is unnecessary, it unlocks the Research Module, which provides a significant (nearly 2x) boost to research speed. In addition, it unlocks Synaptic Link Data Analysis (and its improved versions). Synaptic Link Data Analysis further improves research speed, but more importantly, it and its upgraded versions are required for the most powerful later-game technology, and nearly all T3 technology.
',
'cachedsb' => '- Tips
- Building and exploring
- Researching
- Weapons
- Offense
- Defense
- Economy
'
),
'alpha2' => array(
'autogen' => TRUE,
'title' => 'Alpha 2 - Walkthrough',
'titlebar' => '» Walkthrough » Alpha 2',
'text' => 'Alpha 2: Power surge detected
Time limit: 1 hour
Back to the base
Well, the game\'s starting to get more interesting now. You have two choices of weapons: Machinegun and Flamer.
As soon as this level starts, move your army slightly south of the entrance to your base, where you will encounter two bunkers (they look like shacks) and some scavengers. Flamers are especially powerful against these bunkers, so if you have some, try it out.
If you\'re having trouble, retreat to the MG towers you built earlier (you did build those when we told you to, right?)
Once the two bunkers are down, press south to the first enemy base.
Destroy more outposts
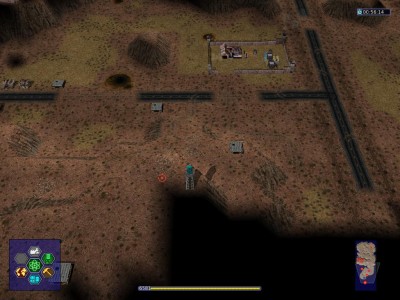
If you have flame tanks leading the charge, then just head straight into the base. If not, then have your tanks skirt southeast from the small chokepoint, and then have them head west, shooting up the towers and base buildings with your whole force, rather than one tank at a time. The base holds upgrades for your flamers.
| | Price | Effect |
|---|
| High Temperature Flamer Gel | $18 | - Upgrades flamer damage to 130%
|
| * High Temperature Flamer Gel Mk2 | $37 | - Upgrades flamer damage to 160%
|
| * High Temperature Flamer Gel Mk3 | $75 | - Upgrades flamer damage to 190%
|
You should be able to take out most of the structures you see in the picture before your force is depleted (read: retreated) enough to make it unusable. You may run into some units coming from the west, but you should be able to take care of them as well.
On your second pass, get on the hill in the bottom left of the above picture, and pick up the sensor research from it. Then, get your tanks back down.
| | Price | Effect |
|---|
| Sensor Turret | $28 | |
| * Sensor Tower | $28 | - Gives new structure: Sensor Tower
|
If you feel like it, have your trucks put a couple MG towers in the area at the bottom right of the screenshot as well. Have your MG tanks cover them as they do so; scavengers like to pop out of the houses in that vicinity.
When the sensor tech is retrieved, and the MG towers are up, (and your tanks are suitably repaired), head west and north to the next scavenger base.
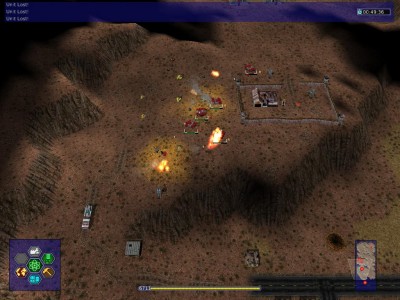
This base is outright nasty. Flamers (including one on a fire truck), a number of units, guard towers, bunkers... The best way to handle all this is with an all-MG force, set to maximum-range firing. Make sure to destroy the flamers before they get in range of you.
Once you\'ve managed to take out the flame tower and the fire truck (and the two bunkers) guarding the ramp, this assault gets much easier; yes, they have a lot of units and buildings, but you can use the same "overpowering" strategy you\'ve been using. Don\'t feel you need to produce a huge army; eight MG tanks are usually enough to get through all of Alpha 2 up to this point, with no losses.
Destroying this base yields the Twin Machinegun. Though not absolutely necessary, now would be a good time to recycle your MG tanks for the new TMG.
| | Price | Effect |
|---|
| Twin Machinegun | $37 | |
Regroup, and it\'s time to head south to the next base.
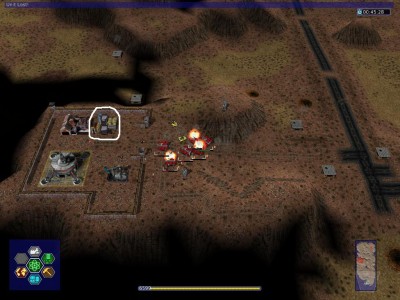
This base may look less nasty than the previous one, but they have a lot of units that will attack you as you approach it.
It may take two or three push-retreats, but taking this base is otherwise no different than taking the others. There will be a Power Module artifact here.
You may be tempted to leave the circled structure alive so that you can use your leftover time to rebuild, research, etc, but it is unnecessary - the first half of the next stage is untimed.
| | Price | Effect |
|---|
| Power Module | $37 | - Upgrades power production to 125%
- Gives new structure: Power Module
|
« Prev
| Next »
',
'cachedsb' => ' - Alpha 2: Power surge detected
- Back to the base
- Destroy more outposts
'
),
'alpha3' => array(
'autogen' => TRUE,
'title' => 'Alpha 3 - Walkthrough',
'titlebar' => '» Walkthrough » Alpha 3',
'text' => 'Alpha 3: The power module artifact
More power
Time limit: unlimited
Well, this is the last time you\'ll have a mission with no timer until the end of the game. This mission ends when you upgrade your Power Generator with a Power Module. So as long as you don\'t do that, you\'ll have all the time in the world.
First, if you haven\'t done so already, it\'s time to recycle any of your machinegun tanks and turn them into twin machinegun tanks.
Next, do you see that road at the lower right edge of the map? If you thought there might be an attack from there later, you\'d be right. You don\'t have very many good defenses at this point in the game, so just make a few MG towers for now.
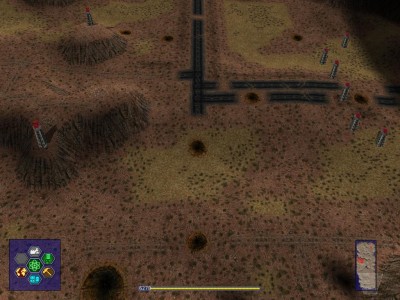
Now, some players like to leave the game running for a while, to accumulate power. Personally, I don\'t think this is necessary - you rarely run out of power in the campaign, and if you\'re doing something as cheap as accumulating power in an unlimited-time stage, you might as well just cheat.
Now let\'s get ready for the second half of this stage. The second half of this stage is fairly easy, but it does have a short time limit.
This stage will be your first away stage. You will take ten tanks to a different map to fight. Ten Twin Machinegun Viper Wheels should be enough, but some players prefer 9 TMGs and a truck, or 8 TMGs and two repair turrets, etc.
Bring your chosen ten units to the LZ (Landing Zone). That\'s the place in the middle of your base where there are lights that form an "X". Now you\'re ready. It\'s time to build that Power Module.
New orders
Time limit: 15 minutes
Right after the Power Module finishes building, you get your new orders. Select your ten units, enter the transport, and let\'s go.
You\'ll land in a new map. If you brought your truck, now\'s the time to set up defenses:

If you didn\'t, just bring your whole army with you on your attack. Your LZ will get overrun, but you can reclaim it on your way back.
Now, just march your tanks straight up (and a little bit to the right) to the enemy base. Scavengers will pull interesting stunts like trying to flank you, but you have enough firepower to handle them.
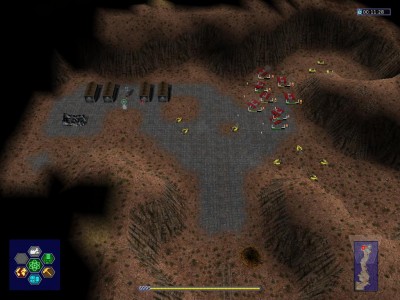
Here we are. Make sure to destroy that flamer tower before getting too close.
| | Price | Effect |
|---|
| Heavy Machinegun | $75 | |
Now, just head back to the LZ, and we\'re done.
« Prev
| Next »',
'cachedsb' => ' - Alpha 3: The power module artifact
- More power
- New orders
'
),
'alpha4' => array(
'autogen' => TRUE,
'title' => 'Alpha 4 - Walkthrough',
'titlebar' => '» Walkthrough » Alpha 4',
'text' => '',
'cachedsb' => ''
),
'alpha5' => array(
'autogen' => TRUE,
'title' => 'Alpha 5 - Walkthrough',
'titlebar' => '» Walkthrough » Alpha 5',
'text' => 'Alpha 5: Encoded signals detected
To the LZ
Time limit: 1 hour
So far, it\'s been pretty easy. Well, this time, it won\'t be. You get an hour, but since this stage gives you a bunch of useful research artifacts, it\'s best to rush through it so you have time left over to research them (not that that\'s easy). You\'ll need them for the next stage.
Secure the zone
Once you arrive, you\'ll get a message from New Paradigm. It boils down to "Leave, or die." Of course, it wouldn\'t be a very fun game if we did either, so we\'ll be doing neither.
As usual, have your truck start building defenses.
Project HQ tells you they\'re near the bottom, and helpfully mark their location for you. Don\'t go there directly; it\'s a trap. Instead, follow the arrows on the minimap here:
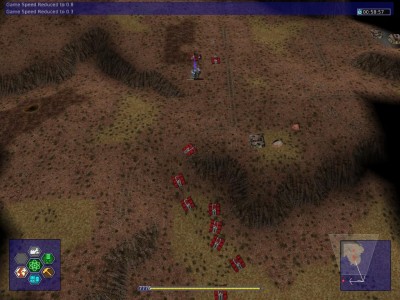
Now, set all your units to "Hold Fire" (and save the game). This is important, since you\'ll soon meet a New Paradigm sensor, and if you shoot it, NP will send a pretty big army to attack yours.
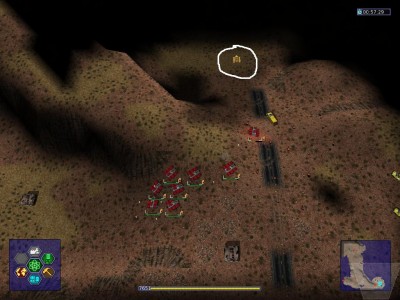
While in Hold Fire mode, you\'ll have to click on enemy scavengers manually. And yes, you did just see a cannon on a school bus.
Once the New Paradigm sensor is gone, move north until you see a scavenger base. Project HQ will decide that\'s enough, and let you call reinforcements.
Reinforcement time: 2 minutes
Do so immediately. Get some of those Mortar Viper Half-Tracks, some more HMGs, anything you have. As you wait, start building some more defenses:
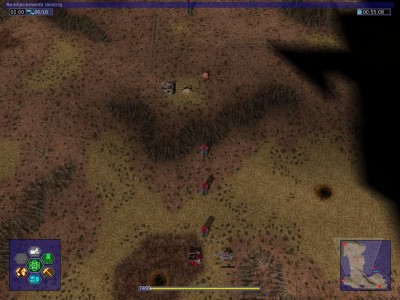
Start building a sensor tower near the scavenger base, as well:
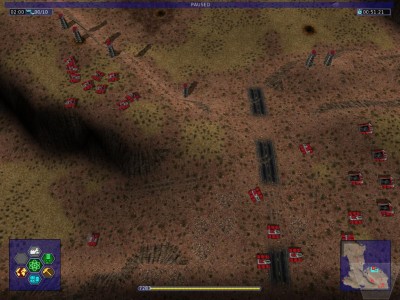
Reinforcing a sensor tank also works, but it will have slightly less range than a sensor tower.
When your mortars arrive, assign them to your sensor, and they\'ll start attacking the scavenger base from afar (if you\'re using a sensor tank, target the scavenger base manually). You might get attacked by scavenger units, but your MG tanks should be able to deal with them.
Either way, make sure not to destroy the whole base (but do destroy their factory, so they can\'t send anything more at you). Now send an MG tank (in hold fire mode) over to grab that artifact. It\'s Light Cannon:
| | Price | Effect |
|---|
| Light Cannon | $75 | |
| * HEAT Cannon Shells | $37 | - Upgrades cannon damage to 130%
|
| * HEAT Cannon Shells Mk2 | $75 | - Upgrades cannon damage to 160%
|
| * HEAT Cannon Shells Mk3 | $112 | - Upgrades cannon damage to 190%
|
The Light Cannon is better against the New Paradigm\'s tanks and structures than any of your other weapons so far, and it\'s also better at soaking damage. Design some Light Cannon Viper Half-Tracks, and start manufacturing them. If the New Paradigm hasn\'t attacked you yet, you might want to save here, as well.
While waiting for your cannon tanks to arrive, you might want to build another sensor tower northwest of you. You should see some New Paradigm forces, but as long as you don\'t get too close (or start shooting them), they should leave you alone. You might want to build some more MG towers, too:
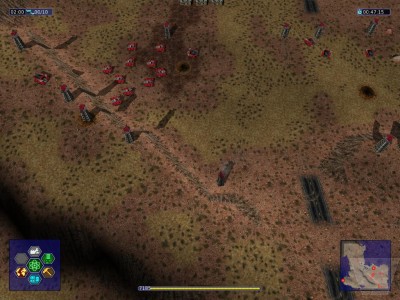
Move your machineguns back to the LZ to meet your new cannons. Well, now you should have your army of mixed machineguns and cannons, as well as some mortars.
Before we begin our attack, let\'s see what we\'re up against.
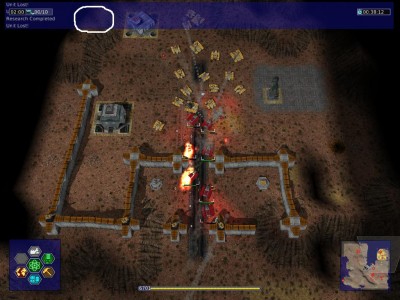
...yeah. Now do you see why we did so much preparation? Now for our plan:
1. Attach your mortars to the new sensor tower.
2. Move your MG units due east, and set them to retreat at heavy damage. They will end up overlooking a valley where scav units are poised to make a surprise strike on you. Fortunately, from the ledge above them, you should be able to gun down 80-100% of their force before they leave the valley.
3. As soon as the New Paradigm announces hostile intentions via cutscene, move your cannon tanks due east of where they are currently sitting, to just outside the range of the NP cannon-tower at the base\'s corner. Make sure they are set to Do or Die.
NP will first attack with a wave of lighter tanks. Your earlier MG towers should be able to handle them. Keep them constantly repaired with a truck, and the truck constantly repaired with a repair turret.
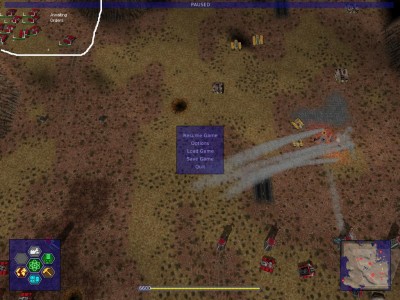
NP\'s stronger units will stay in their base. You can lure them out by having your mortars hit one of their structures (hit, no need to destroy). Make sure to retreat your mortars behind your MG towers immediately; mortars are fragile and you don\'t want one to get killed.
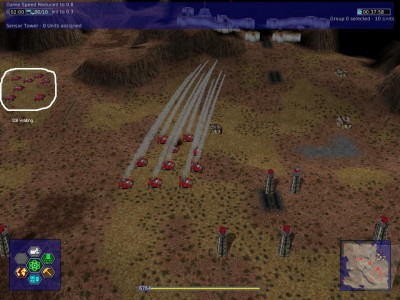
Wait for the enemy commander to come out, then ambush him with your cannons. You\'ll notice the commander has a ton of HP.
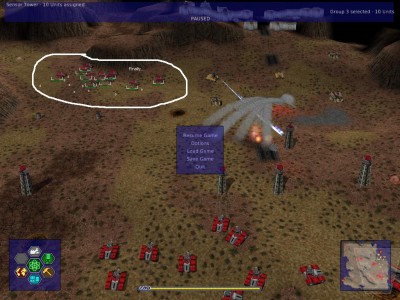
Pay attention to your units\' HP, and retreat any that fall to red. If done right, you should be able to pull this off with no casualties.
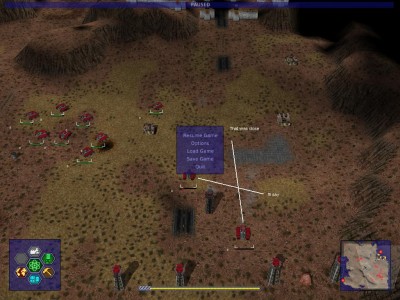
Start repairing everything now, and attacking NP\'s base defenses with mortars from afar. Remember to defend them with your cannons and MGs, as NP may still send some tanks every now and then.

Once the defenses are down, move in with your cannons. Make sure to set them to Hold Fire, since you\'ll be wanting to keep their sensor tower alive so the mission doesn\'t end early.
If all this strategy seems too much to you, I\'ve also heard that spamming 20 to 30 HMG Viper Half-tracks will also work. Make sure none of them are experienced units, though, since you\'ll probably lose quite a few of them.

As mentioned earlier, there\'s a lot of useful tech in this base.
| | Price | Effect |
|---|
| Factory Module | $75 | - Gives new structure: Factory Module
|
| * Medium Body - Cobra | $37 | |
| * Medium Cannon | $150 | |
| * Repair Facility | $75 | - Gives new structure: Repair Facility
|
| * Automated Factory Production | $ ? | - Upgrades factory production speed to 130%
|
| * Automated Factory Production Mk2 | $75 | - Upgrades factory production speed to 160%
|
| * Automated Factory Production Mk3 | $ ? | - Upgrades factory production speed to 190%
|
| * Chaingun Upgrade | $112 | - Upgrades machinegun rate of fire to 118%
|
| * Rapid Fire Chaingun | $150 | - Upgrades machinegun rate of fire to 143%
|
| * Hyper Fire Chaingun | $212 | - Upgrades machinegun rate of fire to 182%
|
| Command Relay Center | $37 | - Gives new structure: Command Relay Center
|
| Hardcrete | $18 | - Gives new structure: Hardcrete Wall
|
TODO: Finish this list
All of this takes around 20 minutes to research. While you\'re waiting, start demolishing all those structures you don\'t need; you\'ll get half your money back. Also open up your design screen. Your new combat units should be Heavy Machinegun Cobra Half-Tracks, Medium Cannon Cobra Half-Tracks, and Mortar Cobra Half-Tracks.
Don\'t recycle your units yet. Wait until Alpha 6.
When you\'re ready, destroy that last sensor tower, and end the stage.
« Prev
| Next »',
'cachedsb' => ' - Alpha 5: Encoded signals detected
- To the LZ
- Secure the zone
'
),
'alpha6' => array(
'autogen' => TRUE,
'title' => 'Alpha 6 - Walkthrough',
'titlebar' => '» Walkthrough » Alpha 6',
'text' => '',
'cachedsb' => ''
),
'alpha7' => array(
'autogen' => TRUE,
'title' => 'Alpha 7 - Walkthrough',
'titlebar' => '» Walkthrough » Alpha 7',
'text' => '',
'cachedsb' => ''
),
'alpha8' => array(
'autogen' => TRUE,
'title' => 'Alpha 8 - Walkthrough',
'titlebar' => '» Walkthrough » Alpha 8',
'text' => '',
'cachedsb' => ''
),
'alpha9' => array(
'autogen' => TRUE,
'title' => 'Alpha 9 - Walkthrough',
'titlebar' => '» Walkthrough » Alpha 9',
'text' => '',
'cachedsb' => ''
),
'alpha10' => array(
'autogen' => TRUE,
'title' => 'Alpha 10 - Walkthrough',
'titlebar' => '» Walkthrough » Alpha 10',
'text' => '',
'cachedsb' => ''
),
'alpha11' => array(
'autogen' => TRUE,
'title' => 'Alpha 11 - Walkthrough',
'titlebar' => '» Walkthrough » Alpha 11',
'text' => '',
'cachedsb' => ''
),
'alpha12' => array(
'autogen' => TRUE,
'title' => 'Alpha 12 - Walkthrough',
'titlebar' => '» Walkthrough » Alpha 12',
'text' => '',
'cachedsb' => ''
),
'beta1' => array(
'autogen' => TRUE,
'title' => 'Beta 1 - Walkthrough',
'titlebar' => '» Walkthrough » Beta 1',
'text' => '',
'cachedsb' => ''
),
'beta2' => array(
'autogen' => TRUE,
'title' => 'Beta 2 - Walkthrough',
'titlebar' => '» Walkthrough » Beta 2',
'text' => '',
'cachedsb' => ''
),
'beta3' => array(
'autogen' => TRUE,
'title' => 'Beta 3 - Walkthrough',
'titlebar' => '» Walkthrough » Beta 3',
'text' => '',
'cachedsb' => ''
),
'beta4' => array(
'autogen' => TRUE,
'title' => 'Beta 4 - Walkthrough',
'titlebar' => '» Walkthrough » Beta 4',
'text' => '',
'cachedsb' => ''
),
'beta5' => array(
'autogen' => TRUE,
'title' => 'Beta 5 - Walkthrough',
'titlebar' => '» Walkthrough » Beta 5',
'text' => '',
'cachedsb' => ''
),
'beta6' => array(
'autogen' => TRUE,
'title' => 'Beta 6 - Walkthrough',
'titlebar' => '» Walkthrough » Beta 6',
'text' => '',
'cachedsb' => ''
),
'beta7' => array(
'autogen' => TRUE,
'title' => 'Beta 7 - Walkthrough',
'titlebar' => '» Walkthrough » Beta 7',
'text' => '',
'cachedsb' => ''
),
'beta8' => array(
'autogen' => TRUE,
'title' => 'Beta 8 - Walkthrough',
'titlebar' => '» Walkthrough » Beta 8',
'text' => '',
'cachedsb' => ''
),
'beta9' => array(
'autogen' => TRUE,
'title' => 'Beta 9 - Walkthrough',
'titlebar' => '» Walkthrough » Beta 9',
'text' => '',
'cachedsb' => ''
),
'beta10' => array(
'autogen' => TRUE,
'title' => 'Beta 10 - Walkthrough',
'titlebar' => '» Walkthrough » Beta 10',
'text' => '',
'cachedsb' => ''
),
'beta11' => array(
'autogen' => TRUE,
'title' => 'Beta 11 - Walkthrough',
'titlebar' => '» Walkthrough » Beta 11',
'text' => '',
'cachedsb' => ''
),
'gamma1' => array(
'autogen' => TRUE,
'title' => 'Gamma 1 - Walkthrough',
'titlebar' => '» Walkthrough » Gamma 1',
'text' => '',
'cachedsb' => ''
),
'gamma2' => array(
'autogen' => TRUE,
'title' => 'Gamma 2 - Walkthrough',
'titlebar' => '» Walkthrough » Gamma 2',
'text' => '',
'cachedsb' => ''
),
'gamma3' => array(
'autogen' => TRUE,
'title' => 'Gamma 3 - Walkthrough',
'titlebar' => '» Walkthrough » Gamma 3',
'text' => '',
'cachedsb' => ''
),
'gamma4' => array(
'autogen' => TRUE,
'title' => 'Gamma 4 - Walkthrough',
'titlebar' => '» Walkthrough » Gamma 4',
'text' => '',
'cachedsb' => ''
),
'gamma5' => array(
'autogen' => TRUE,
'title' => 'Gamma 5 - Walkthrough',
'titlebar' => '» Walkthrough » Gamma 5',
'text' => '',
'cachedsb' => ''
),
'gamma6' => array(
'autogen' => TRUE,
'title' => 'Gamma 6 - Walkthrough',
'titlebar' => '» Walkthrough » Gamma 6',
'text' => '',
'cachedsb' => ''
),
'gamma7' => array(
'autogen' => TRUE,
'title' => 'Gamma 7 - Walkthrough',
'titlebar' => '» Walkthrough » Gamma 7',
'text' => '',
'cachedsb' => ''
),
'gamma8' => array(
'autogen' => TRUE,
'title' => 'Gamma 8 - Walkthrough',
'titlebar' => '» Walkthrough » Gamma 8',
'text' => '',
'cachedsb' => ''
),
'gamma9' => array(
'autogen' => TRUE,
'title' => 'Gamma 9 - Walkthrough',
'titlebar' => '» Walkthrough » Gamma 9',
'text' => '',
'cachedsb' => ''
),
'researchstrategy' => array(
'autogen' => TRUE,
'cachedsb' => ''
),
'formulas' => array(
'cachedsb' => ''
),
'latestcomments' => array(
'autogen' => TRUE,
'title' => 'Latest comments',
'titlebar' => 'Secret » Latest comments',
'text' => ' $entry)
{
if (isset($entry[\'subdirs\']))
processcomments($cid);
else
foreach ($entry as $curcomment)
{
$curcomment[\'id\'] = ($id?$id.\'/\':\'\').$cid;
$comments[] = $curcomment;
}
}
}
function datecmp($a, $b)
{
return 0-$a[\'time\']+$b[\'time\'];
}
processcomments();
usort($comments, \'datecmp\');
foreach ($comments as $i => $comment)
{
if ($i==50) break;
echo \'\'.htmlspecialchars($comment[\'name\']).\'\'.($comment[\'admin\']?\' [Admin]\':\'\').\' wrote \'.onreldate($comment[\'time\']).\' in \'.$comment[\'id\'].\':
\'.($comment[\'htmlcomment\']?$comment[\'msg\']:nl2br(htmlspecialchars($comment[\'msg\']))).\'
\';
}
?>',
'cachedsb' => ''
),
'cheats' => array(
'autogen' => TRUE,
'title' => 'Cheats',
'titlebar' => '» Cheats',
'text' => 'These instructions only apply to 2.3 beta 6 and higher. For older versions, see wiki:cheats
Enabling cheats
Before you can use cheat codes, you must either use the cheat code "cheat on" or press Shift+Backspace. You should get a "Cheats enabled" message when you do this.
Using cheats
To use a cheat code, press Enter, type the code, and press Enter again.
Cheats marked with "✓" can crash the game. Try to avoid using them.
| Cheat Code | Cheat Description
|
|
|
| Controls
|
| mouseflip | Inverts the mouse vertical rotation direction |
|
| shakey | Toggle screen shake when units die |
|
| time toggle | Turns the mission timer on or off (campaign mode only) | ✓
|
|
|
| Difficulty Levels
|
| hard | Sets difficulty to hard (replaces previous difficulty) |
|
| normal | Sets difficulty to normal (replaces previous difficulty) |
|
| easy | Sets difficulty to easy (replaces previous difficulty) |
|
| let me win | Causes you to win the current mission (campaign mode only) | ✓
|
|
|
| Misc. & Info.
|
| build info | Tells you the date when the game was built |
|
| count me | Prints the number of objects in the game |
|
| demo | Starts demo mode - See "Additional Cheats" for description |
|
| droidinfo | Shows unit info & stats |
|
| no faults | Audio Clip - "There are no faults in the renderer at the moment" |
|
| sensors | Shows sensor ranges when sensors are selected |
|
| timedemo | Shows game info & stats |
|
| showorders | Shows current order & action for selected droid |
|
|
|
| Power
|
| more power | Adds an additional 1000 power |
|
| superpower | Maximum power |
|
| whale fin | Toggles infinite power |
|
| Research
|
| give all | Allows you to build & research everything | ✓
|
| research all | Gives you everything researched |
|
| work harder | Finishes all active research |
|
|
|
| Strength & Damage
|
| biffer baker | Your units are stronger & deal more damage (replaces previous difficulty) |
|
| double up | Your units are twice as strong (replaces previous difficulty) |
|
| get off my land | Kills all visible enemy units & structures on the map |
|
| kill | Kills the selected units |
|
|
|
| Weather
|
| deity | Lets you see everything on the map (equivalent of having Uplink Center) |
|
| john kettley | Changes the weather to rain, snow, or clear. Keep entering code to cycle weather. |
|
',
'cachedsb' => '- Enabling cheats
- Using cheats'
)
);
?>
